
Have you ever looked at a worn concrete patio or driveway and thought, 'I wish I could make this look better'? What if we told you there's a way to completely refresh your outdoor space without tearing out the old concrete? That's exactly what installing pavers over existing concrete allows you to do. It's like giving your outdoor area a complete makeover while saving time and money.
When it comes to outdoor renovations, few projects offer the dramatic transformation that paver installation can provide. But what happens when you already have concrete in place? You might think you're stuck with that outdated surface forever. Not quite! Installing pavers directly on top of concrete opens up a world of possibilities for homeowners and contractors alike. This approach combines the durability of concrete with the aesthetic appeal of stone or brick pavers. The result? A beautiful, functional outdoor space that looks nothing like the original concrete base.
Why Choose Pavers Over Concrete?
Let's talk about why someone might want to put pavers on concrete instead of starting fresh. First off, it's much more cost-effective than removing the old concrete. Think about it - you're essentially keeping what's already there and just adding a new layer on top. That means less demolition work, less mess, and significantly lower costs. Plus, pavers give you so much more design flexibility. Want a classic brick pattern? Done. Prefer natural stone look? Easy peasy. Need something more modern with geometric shapes? Absolutely possible.
The practical benefits are equally impressive. Concrete can crack, fade, and become slippery when wet. Pavers offer better traction and are much easier to repair individually if one gets damaged. If you're dealing with an uneven concrete surface, pavers can actually help smooth things out a bit. They also allow for better water drainage when properly installed with the right sand and gravel layers underneath.
Essential Preparation Steps
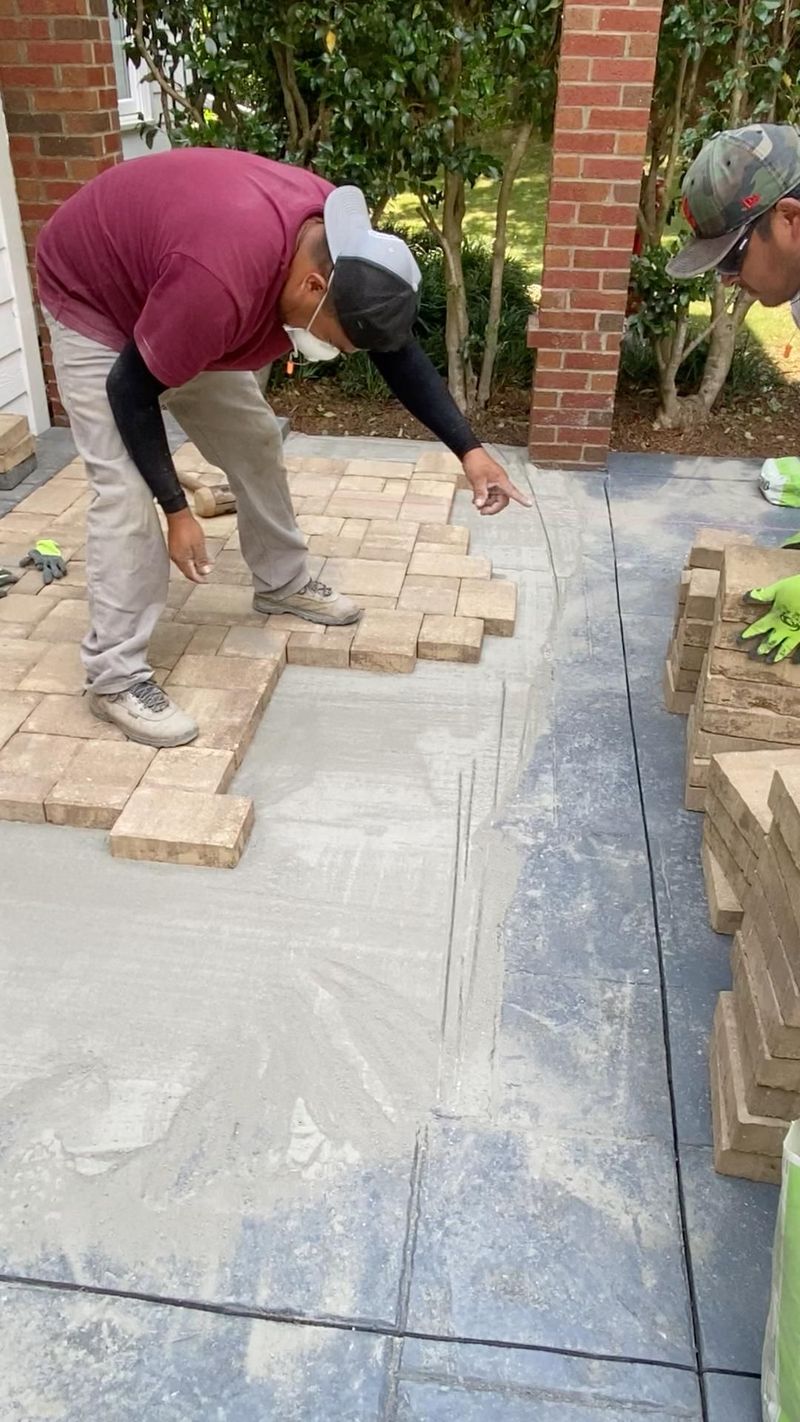
Before you even think about laying down those pavers, proper preparation is absolutely crucial. Start by thoroughly cleaning the concrete surface - remove all dirt, oil, and debris. Use a pressure washer if necessary, but be careful not to damage the concrete itself. Next, inspect the surface for cracks or damage. Any significant issues should be repaired before proceeding. Small hairline cracks might be okay, but anything larger needs attention.
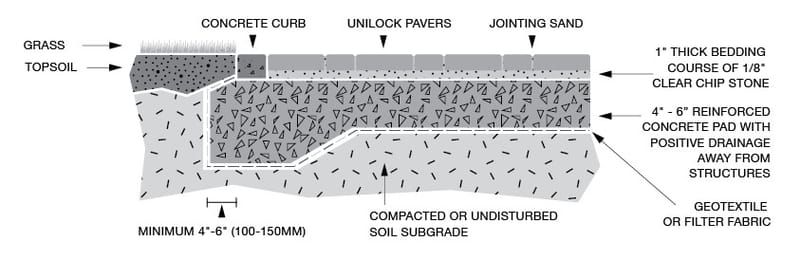
The next step involves creating a stable base. While the concrete provides the foundation, you'll want to add a thin layer of sand or concrete patching compound to ensure everything lies flat. This is especially important if the concrete surface isn't perfectly level. You might also consider using a bonding agent to help the new materials adhere better to the existing concrete. Finally, measure and plan your layout carefully. Consider how the pavers will align with existing features like driveways or walkways.
Choosing the Right Paver Type
Not all pavers are created equal, and choosing the right type makes all the difference in your project's success. For concrete overlays, you'll generally want to go with thinner pavers - typically between 1 and 2 inches thick. Thicker pavers can make the whole structure too heavy and may cause settling issues. Stone pavers work beautifully because they're naturally durable and come in many attractive varieties. Brick pavers offer that classic look that many people love, while concrete pavers provide excellent value and consistency.
Consider the climate in your area too. If you get lots of freeze-thaw cycles, choose pavers rated for those conditions. Also think about maintenance - some pavers require sealing every few years, while others are virtually maintenance-free. For outdoor spaces, always opt for pavers that are UV resistant and won't fade easily. The color and texture should complement your existing home architecture and landscape design.
Installing the Base Layer
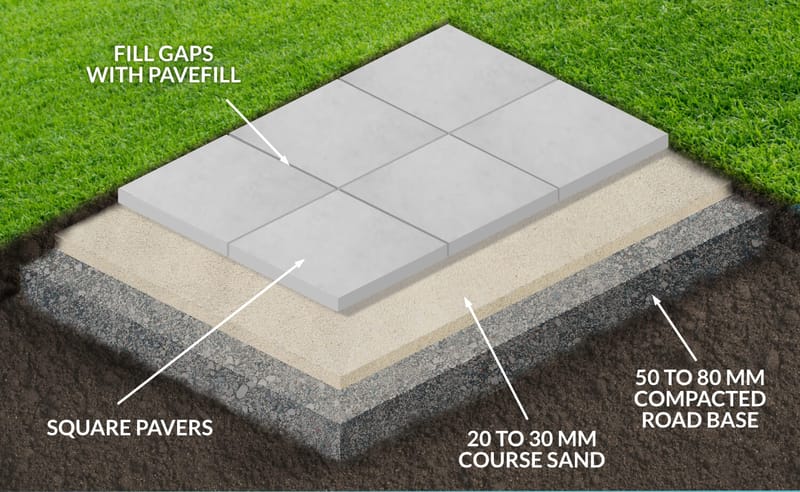
Here's where things get technical, but don't worry - we'll break it down. The base layer is critical for ensuring your pavers stay level and don't shift over time. Start by spreading a 1-inch layer of coarse sand over the prepared concrete surface. This creates a smooth, even bed for your pavers. Use a screed board or straight edge to level the sand evenly across the entire area. You want everything nice and flat.
Some experts recommend adding a small amount of concrete patching compound mixed with sand for extra stability, especially if the concrete surface is uneven. The mixture should be thick enough to hold its shape but still spreadable. Work in sections, keeping the sand level as you go. This process requires patience and attention to detail, but it's worth the effort. Once you've completed one section, let it settle for a few hours before continuing with the next area.
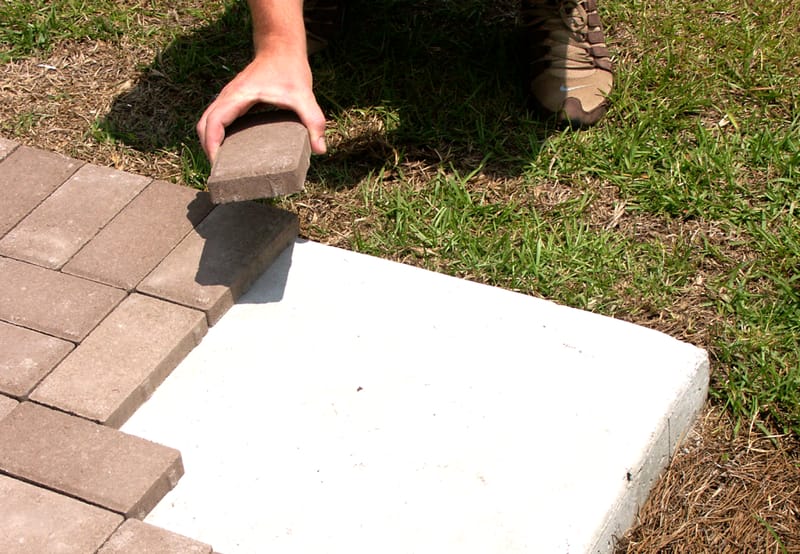
Laying the Pavers Properly
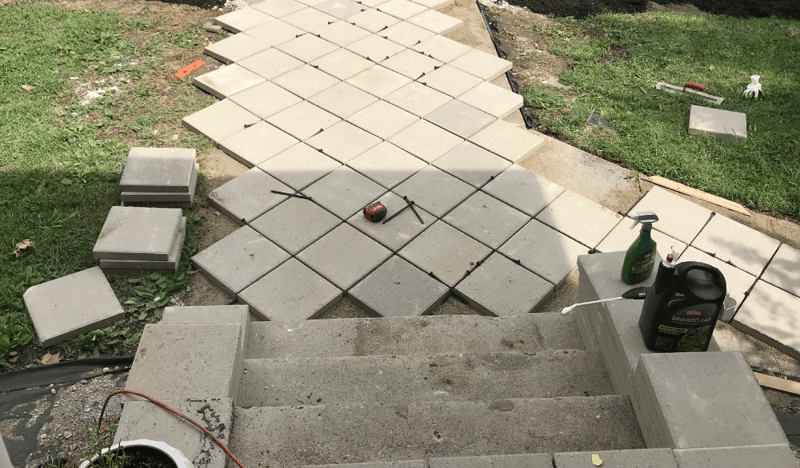
Now comes the fun part - actually placing the pavers. Begin from one corner and work systematically outward. Lay them in your planned pattern, checking frequently that they remain level and aligned. Use a rubber mallet to tap them gently into place if needed. Make sure each paver sits firmly against its neighbors without gaps.
This is where experience really matters. A good rule of thumb is to leave about 1/8 inch gap between pavers for expansion and contraction. Some people prefer a tighter fit, but that often leads to problems over time. Keep your measuring tape handy to check distances regularly. If you notice any pavers sitting higher or lower than others, adjust them immediately. Don't wait until the end to fix these issues.
It's also helpful to lay a few extra pavers around the perimeter first - this gives you room to make adjustments and ensures you don't run short. When you're satisfied with the layout, take a step back and admire your work. The visual impact of a well-laid paver pattern is truly impressive.
Finishing Touches and Maintenance
Once all your pavers are laid, it's time for the finishing touches. Sweep a fine layer of sand over the top to fill the gaps between pavers. Use a broom to work the sand into the joints, then sweep away any excess. This sand acts as a stabilizer and helps prevent weeds from growing between the pavers.
Related Posts

Unveiling the Timeless Charm of Black and White Striped Patio Um

Unpacking the Truth About Walking on Pool Covers Your Essential

Mastering the Art of the Perfect Pool Party Experience A Guest's Guide

Understanding the Pink Slime in Your Pool What It Is and How to Tackle It

Keeping Your Concrete Patio Happy and Safe Around the Fire Pit

Transforming Your Corner Lot A Masterclass in Curb Appeal
Some people like to seal their pavers after installation. This adds protection against stains and weather damage, though it's not always necessary. If you do decide to seal, wait at least 48 hours after installation and follow the manufacturer's instructions carefully. Regular maintenance is simple - just sweep occasionally and occasionally wash with mild soap and water.
A common mistake people make is trying to use heavy equipment on newly installed pavers. Give the installation time to settle - usually about a week before heavy use. After that, your new paver surface should last decades with proper care. Many homeowners report that their paver installations have lasted 20+ years with minimal maintenance.
Putting pavers on top of concrete isn't just about aesthetics - it's about smart renovation choices that deliver lasting value. You've learned that this approach saves both time and money compared to full concrete replacement, while offering superior design flexibility. The key is proper preparation, selecting the right materials, and taking your time during installation. Whether you're refreshing a tired patio or creating a stunning entranceway, this technique gives you the power to transform your outdoor spaces dramatically.
Remember, patience pays off in the end. Rushing through any step of the process can lead to problems later. Take time to ensure everything is level and properly secured. When done correctly, your paver installation will not only look fantastic but also provide years of enjoyment and functionality. So why wait? Your concrete surface might just be the perfect canvas for your next outdoor masterpiece.
