
Have you ever looked at a brick fireplace and thought 'this could use some love'? You're not alone. Many homeowners face the challenge of transforming their dated brick hearths into stunning focal points. Whether you're dealing with weathered brick, old paint, or simply want to update your space's look, painting over brick can work wonders. But it's not just about slapping on some color. There's technique, preparation, and a little magic involved. Let's dive into what makes this transformation possible and how it can completely change your room's vibe.
There's something deeply satisfying about breathing new life into a space with just a few coats of paint. When it comes to brick fireplaces, the possibilities are endless. You might think that painting over brick is impossible, but it's actually quite doable with the right approach. It's like giving an old friend a fresh outfit – suddenly they're looking their best. The process isn't complicated, but it does require some planning and know-how. This journey from dull to dazzling involves understanding the material, preparing properly, and choosing the right products. We'll walk through everything you need to know, showing you how simple transformations can create major impact.
Understanding Brick Fireplace Materials
Before you even think about paint, you need to know what you're working with. Brick fireplaces come in various forms, each requiring slightly different treatment. The most common types include clay brick, concrete brick, and manufactured brick. Clay bricks tend to be more porous and may absorb paint differently than others. Concrete bricks often have a smoother surface that's easier to paint over. Manufactured bricks can vary greatly depending on their composition. What matters most is understanding if your brick is painted already, uncoated, or has been previously treated. Some older homes might have had paint applied decades ago, creating a surface that needs special attention. Check for loose mortar, cracks, or flaking areas. These issues need fixing before painting begins. The texture of your brick also plays a role. Rougher textures might need more prep work, while smoother surfaces generally paint better. Sometimes you'll find that your brick has a natural patina that adds character, and sometimes you'll want to strip away that aged appearance entirely. Understanding these basics sets the foundation for success.
Essential Preparation Steps
Preparation is where many projects fail or succeed. Proper prep means the difference between a professional-looking finish and a patchy mess. Start by cleaning thoroughly with a stiff brush to remove dirt, grime, and loose particles. For stubborn spots, a degreaser works wonders. If there's old paint, you might need to scrape it off carefully. Some paint will come off easily, while others might require chemical strippers. Always test a small area first. Next, fill any gaps or cracks with appropriate mortar or caulk. Sand rough spots to create a smooth base. This step is crucial because any imperfections show through paint. Apply a high-quality primer designed for masonry surfaces. This creates a solid base and helps paint adhere better. Some experts recommend using a bonding agent for particularly challenging surfaces. Don't skip this step – it's worth the extra time and effort. Finally, mask off surrounding areas carefully. You don't want paint on your mantel or floor. A good painter's tape and some plastic sheeting can save you hours of cleanup later.
Choosing the Right Paint and Tools
The paint choice matters enormously when working with brick. You need a paint specifically formulated for masonry surfaces. Look for products labeled as "masonry paint" or "brick paint." These contain special additives that help them stick and last longer. Latex-based paints are usually preferred because they're easier to work with and clean up. Acrylic paints are also excellent choices. Avoid regular interior paints – they won't hold up well on brick. The color selection depends on your goals. Light colors make spaces feel bigger and brighter. Dark colors add drama and sophistication. White, cream, or soft gray often work well in most settings. For a dramatic effect, consider bold colors like deep navy or forest green. You'll need several tools: a good quality roller with a nap that matches your brick texture, brushes for edges and corners, a paint tray, and possibly a sprayer for larger areas. Quality tools make the job easier and produce better results. Don't skimp on paint – cheaper options often lead to peeling or uneven coverage. Invest in a reputable brand that's designed for exterior or interior masonry use.
Paint Application Techniques
How you apply the paint affects the final result dramatically. Start with a thin, even coat rather than thick layers. Multiple light coats work much better than one heavy application. Roll in the direction of the brick pattern when possible. This helps create a uniform appearance. Work in sections, moving systematically across the surface. Don't rush – let each coat dry completely before applying the next. Most masonry paints require 24 hours between coats. If you're painting a large fireplace, consider doing it in stages over several days. Brush details carefully – corners, edges, and any decorative elements. Use a small brush for tight spaces and touch-ups. Some painters prefer to cut in around the edges with a brush first, then roll the main areas. Others find rolling first and cutting in afterward works better. Experiment with both methods to see what suits your style. Keep your paint mixed consistently throughout the project. Paint can settle and separate, leading to uneven color. Stir regularly and check consistency. Work in good lighting conditions to spot any missed spots or streaks early.
Related Posts

Unveiling the Timeless Charm of Black and White Striped Patio Um

Unpacking the Truth About Walking on Pool Covers Your Essential

Mastering the Art of the Perfect Pool Party Experience A Guest's Guide

Understanding the Pink Slime in Your Pool What It Is and How to Tackle It

Keeping Your Concrete Patio Happy and Safe Around the Fire Pit

Transforming Your Corner Lot A Masterclass in Curb Appeal
Common Mistakes and How to Avoid Them
Even experienced painters can make errors when tackling brick surfaces. One frequent mistake is skipping the primer step. Without proper preparation, paint won't stick well and may peel quickly. Another issue occurs when people try to paint over dirty or greasy surfaces. Cleanliness is essential. Not drying paint thoroughly between coats is another problem. Rushing the process leads to poor adhesion and visible brush marks. Some folks apply too much paint at once, causing drips or runs. Remember, thin and even beats thick and messy. Using the wrong type of paint is also common. Interior house paint won't last on brick, especially in high-traffic areas. Choosing inappropriate colors can also backfire. Dark colors can make small rooms feel cramped. Too bright or garish shades might clash with existing decor. Weather conditions matter too – avoid painting in direct sunlight or during extreme temperatures. Humidity can affect drying times and paint performance. Finally, rushing the curing process means the paint may never fully set. Give it time to dry properly and cure according to manufacturer instructions. Learning from these pitfalls saves time, money, and frustration.
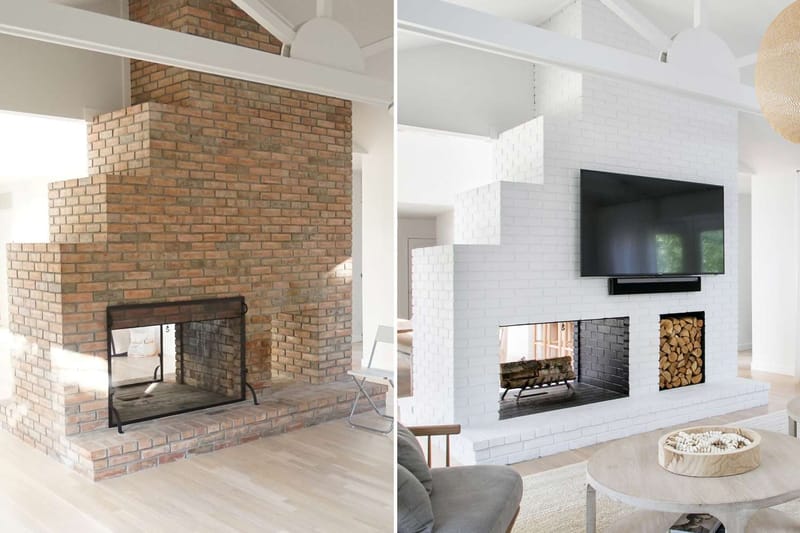
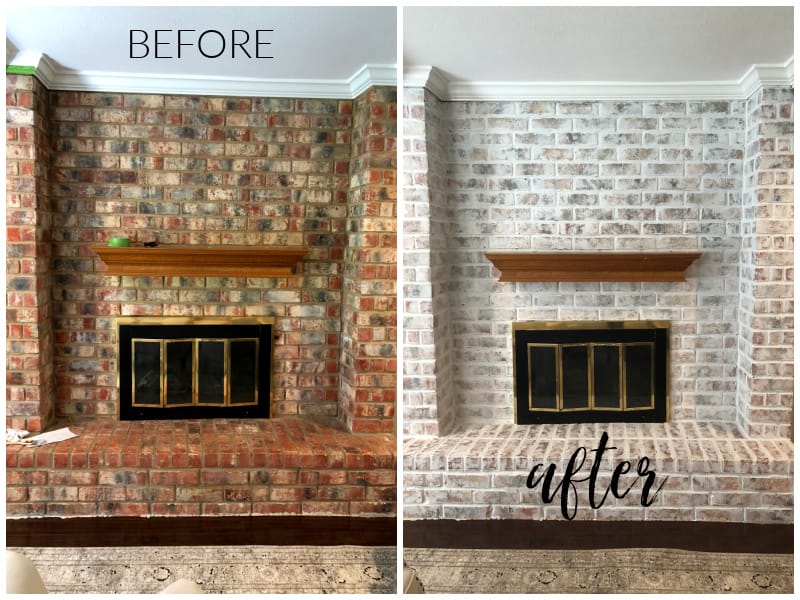
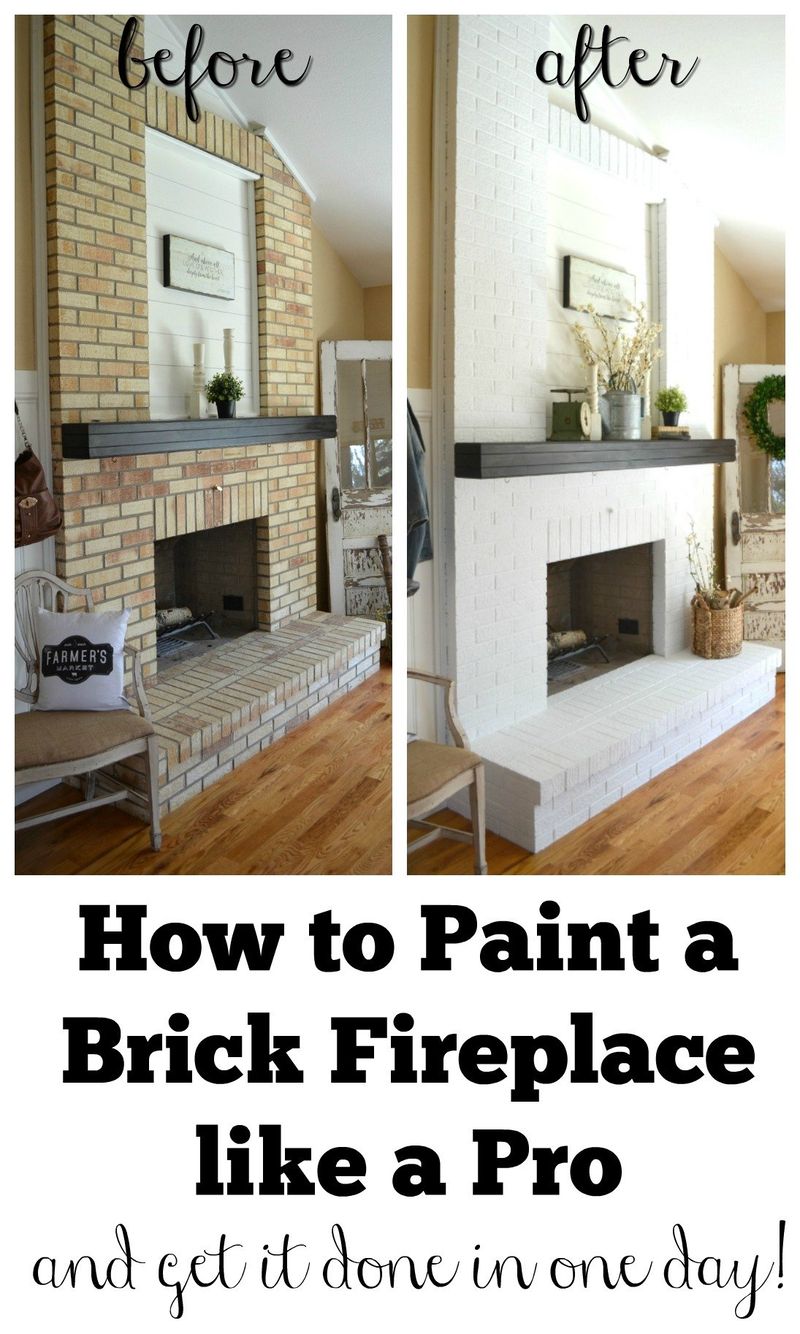
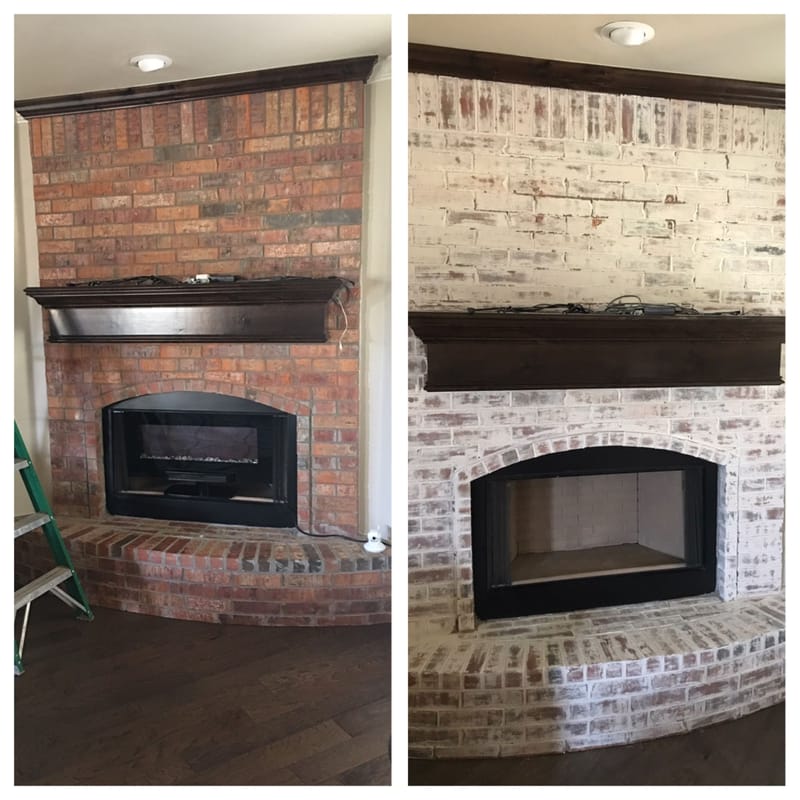
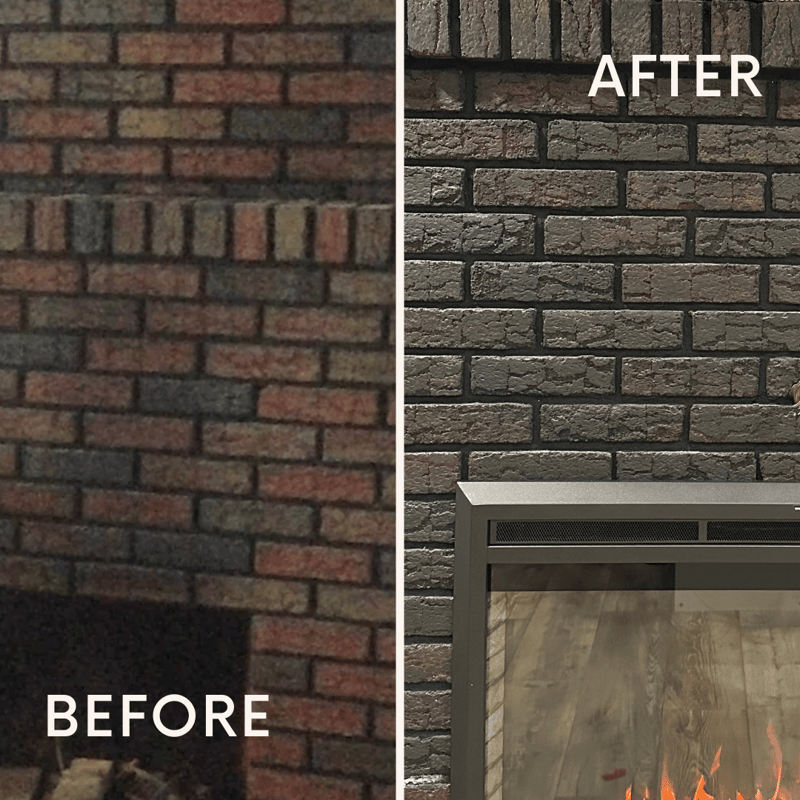
Realistic Before and After Examples
Let's look at some actual transformations to understand what's possible. Imagine a fireplace with weathered red brick that's faded to a dull brown. After thorough cleaning, priming, and painting with a warm cream color, it becomes a beautiful neutral backdrop. The contrast between the clean white paint and rich red brick creates visual interest. Another example shows a dark gray brick fireplace that was painted white. The result is a clean, modern look that makes the entire room feel more spacious. Some homeowners choose to paint their brick in bold colors like deep blue or forest green. These dramatic choices create conversation starters and focal points. The key is matching the paint to your overall design scheme. Consider the room's lighting and existing furniture. A warm yellow might complement a rustic setting perfectly. A cool charcoal gray could enhance contemporary spaces. Sometimes, painting just the surround area while leaving the brick field creates an interesting layered effect. These transformations show how paint can completely change a space's mood and character. The before and after photos reveal not just color changes, but shifts in ambiance and perceived size.
Maintenance and Longevity Tips
Once your project is complete, proper maintenance keeps it looking great for years. Regular dusting prevents buildup that can dull the appearance. Occasionally wash the surface with mild soap and water to remove stains. Avoid harsh chemicals that might damage the paint. Check for chips or wear spots periodically and touch up as needed. Small repairs prevent bigger problems later. If you notice peeling or bubbling paint, address it quickly. The longer you wait, the more extensive the repair becomes. Some homeowners opt for a protective clear coat for extra durability. This is especially useful in high-traffic areas or homes with children. Keep in mind that even the best paint will fade slightly over time due to sunlight exposure. Plan for periodic touch-ups every few years. The investment pays off in maintaining your home's appearance. Consider the fireplace's location – areas near windows might need more attention due to UV exposure. Regular maintenance extends paint life significantly. Think of it as caring for a favorite piece of furniture rather than a temporary fix. Good care ensures your transformation lasts and continues to bring joy to your space.
Painting over brick fireplaces is more achievable than many people realize. With proper preparation, the right materials, and patience, you can transform a dated feature into a stunning focal point. The key lies in understanding your surface, choosing appropriate products, and taking your time with each step. Whether you're going for subtle updates or dramatic changes, the results can be incredibly rewarding. The before and after transformations show how powerful a simple color change can be. Remember that preparation is everything – it's the foundation upon which all else builds. Don't rush the process, and always invest in quality materials. The effort you put in now will pay dividends in years of enjoyment. Your fireplace doesn't have to be a boring background anymore. With careful planning and execution, it can become the star of your living space. Take your time, follow the steps, and enjoy watching your home transform. Every brushstroke brings you closer to your dream space.
