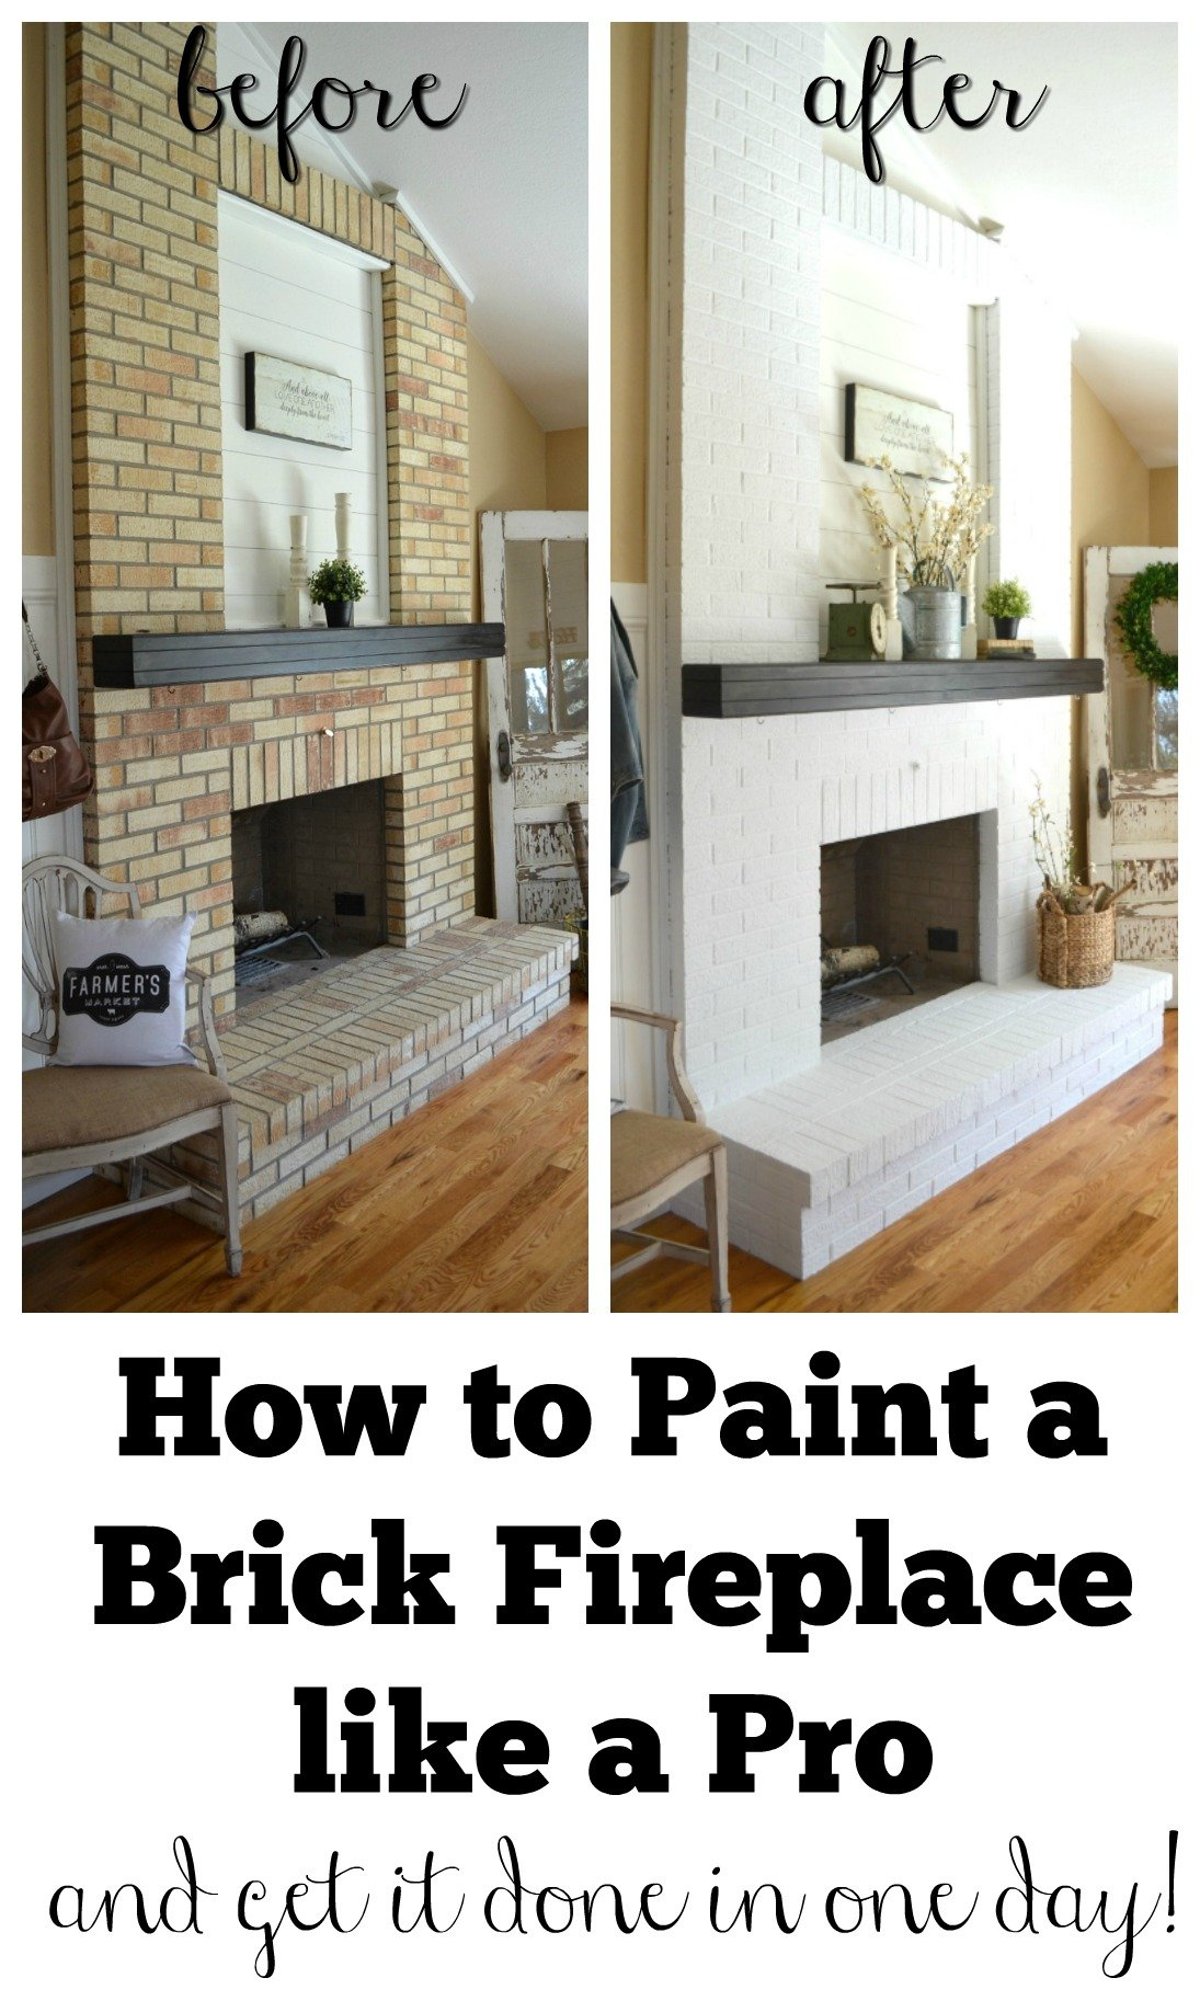
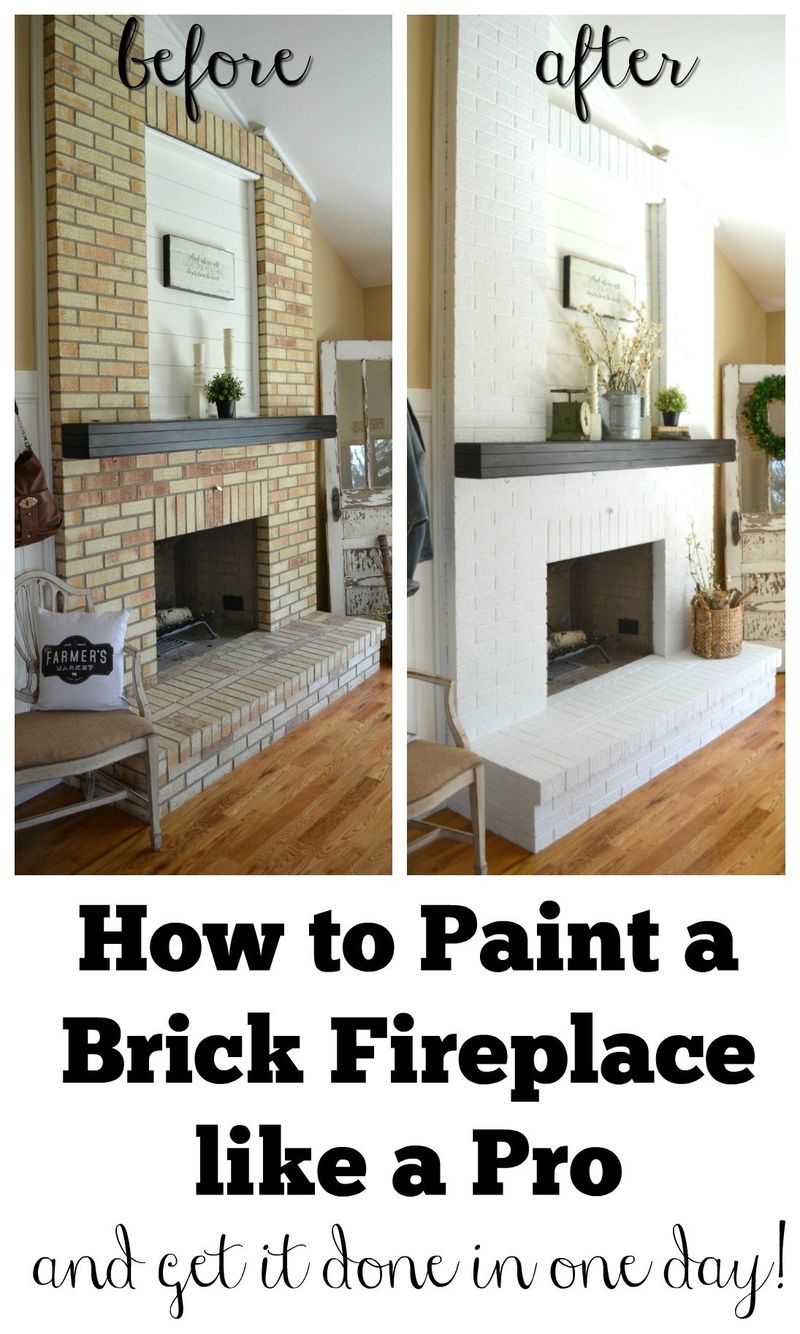
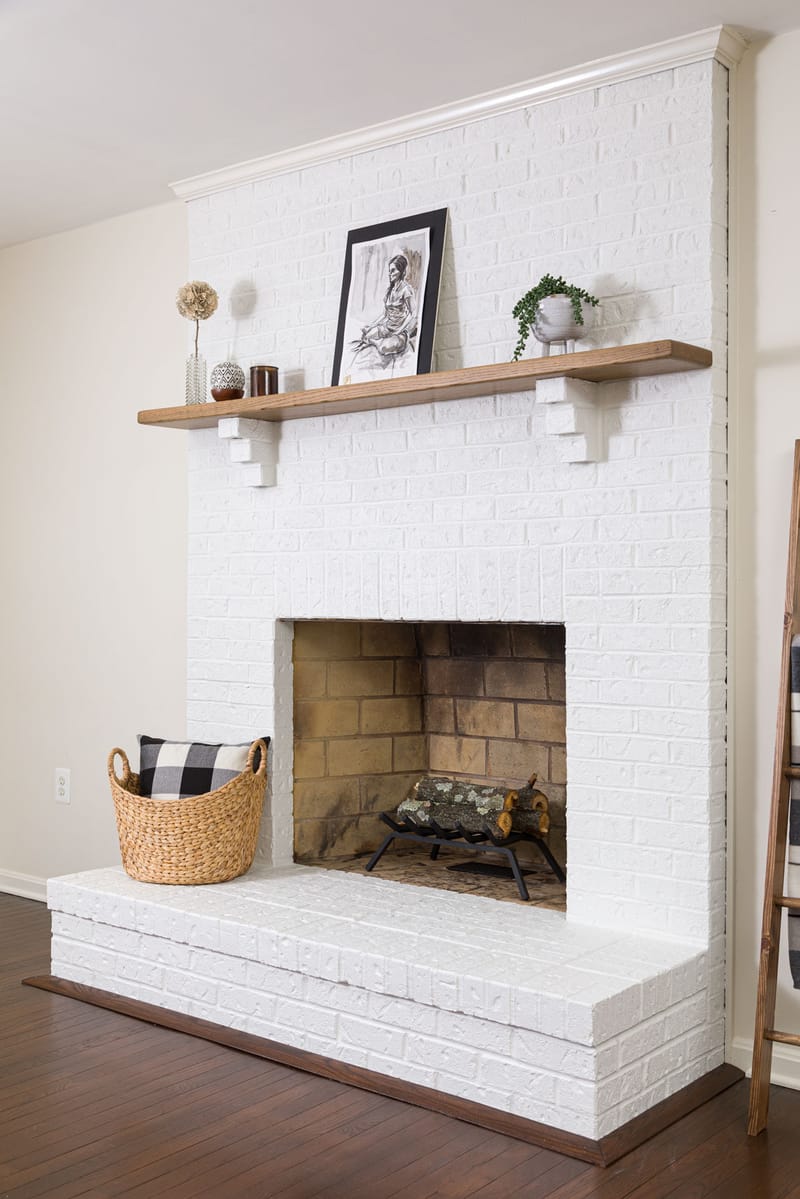
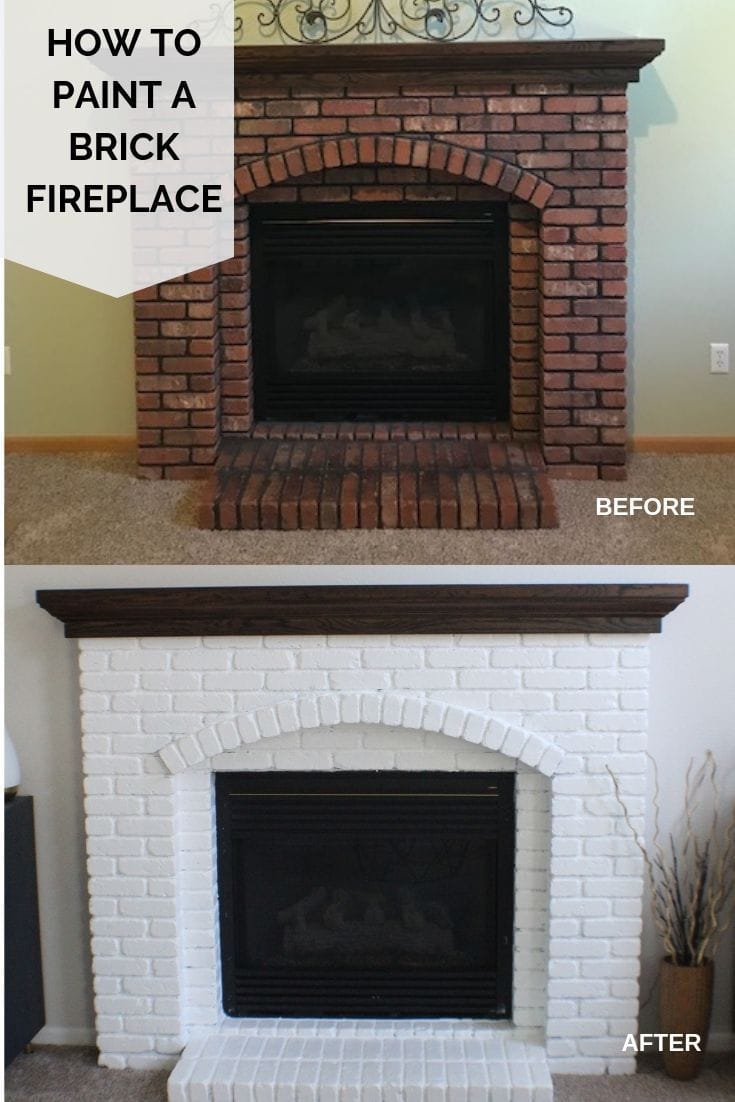
There's something deeply satisfying about giving your fireplace a fresh coat of paint. Whether it's been years since it was last touched up or you simply want to refresh its appearance, painting your fireplace can completely transform your living space. It's not just about aesthetics though - a well-painted fireplace can make your entire room feel more cohesive and inviting. The process might seem daunting at first, but with the right approach and tools, anyone can achieve professional-looking results.
Fireplaces are often the heart of a home, drawing people in with their warmth and charm. But over time, they can become dull, faded, or stained. Maybe you've inherited a fireplace that's seen better days, or perhaps you've simply decided it's time for a change. Whatever the reason, repainting your fireplace can breathe new life into your space. This guide will walk you through everything you need to know, from preparation to final touches, ensuring you get the job done right. You'll discover why certain techniques work better than others, what materials to choose, and how to avoid common pitfalls that can ruin your project.
Understanding Your Fireplace Materials
Before you even think about paint, you need to know what your fireplace is made of. This simple step can save you from major headaches later on. Most fireplaces fall into one of three categories: brick, stone, or manufactured materials like fiber cement or metal. Brick fireplaces are probably the most common and require special attention due to their porous nature. Stone fireplaces, whether natural or faux, need careful consideration because they absorb paint differently than other surfaces. Manufactured materials vary widely in their paintability. Some might need special primers, while others may not require any prep at all. Understanding your material type helps you choose the right paint and technique. For instance, if you have a brick fireplace, you'll likely want to use a masonry paint that's designed to handle moisture and temperature changes. If it's a stone unit, you might need to clean it thoroughly and possibly apply a bonding agent before painting.
Essential Tools and Materials
Gathering your supplies upfront makes the whole process much smoother. You'll need a few basic items that most homeowners already have around the house. Start with a good quality paintbrush and roller - a 2-inch brush works great for edges and corners. A small paint tray is essential for holding paint and keeping it from dripping onto the floor. For larger areas, a foam roller can give you a smoother finish than traditional nap rollers. Don't forget sandpaper, especially fine-grit, for smoothing rough spots. A deglosser might be necessary if your fireplace has a glossy finish that needs to be removed. You'll also want a drop cloth or plastic sheeting to protect your floors and surrounding areas. Quality masking tape helps keep paint off the mantel, surround, and any other areas you don't want painted. Finally, having a good primer and appropriate paint color ready will make the actual painting go much faster.
Preparation Steps That Make All the Difference
This is where many people make their biggest mistakes - skipping proper preparation. Think of it like getting ready for a big event. You wouldn't show up looking sloppy, would you? The same applies to your fireplace. First, remove anything that might get in the way. This includes the fireplace screen, any decorative items, and even the wood stove if applicable. Clean the surface thoroughly using a degreaser or mild soap and water. Remove any loose paint or flaking material with a scraper or wire brush. Sand any rough spots to create a smooth surface. Pay special attention to corners and crevices where dirt and grime tend to accumulate. If you have a glossy surface, use a deglosser to help the new paint adhere better. Once everything is clean and dry, apply painter's tape around the edges and cover the surrounding area. This step alone can prevent a lot of mess and make cleanup much easier. Many people underestimate how important this phase really is.
Choosing the Right Paint and Color
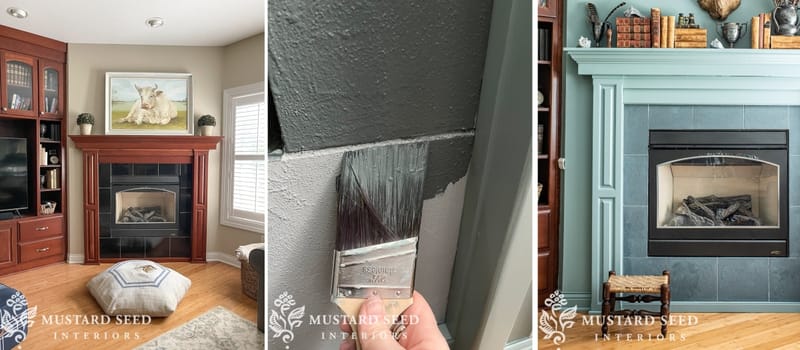
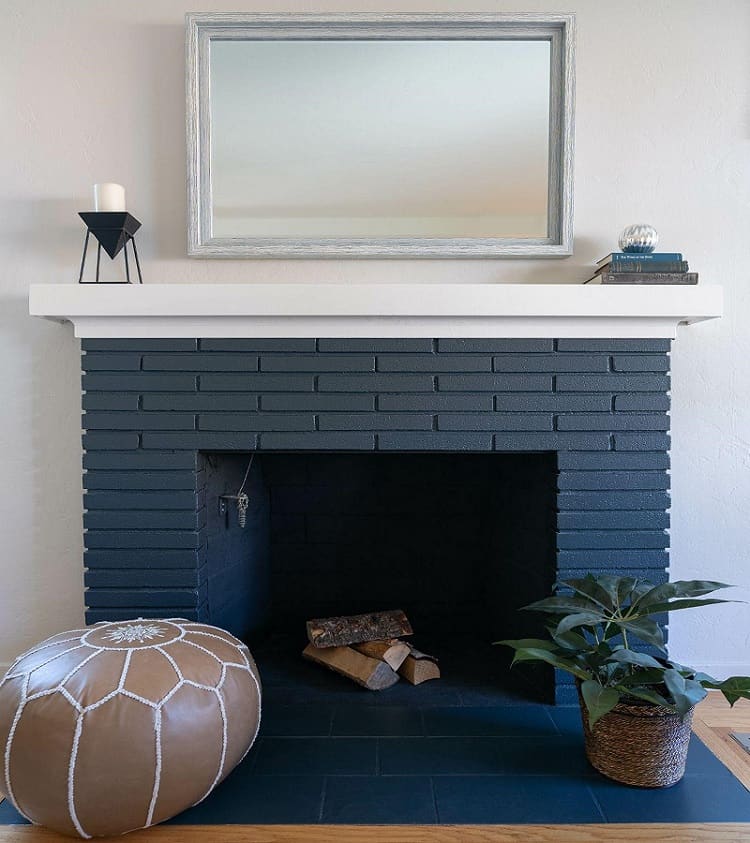
Paint selection can make or break your fireplace project. You need to consider both the type of paint and the color carefully. For masonry surfaces like brick or stone, use a high-quality masonry paint or elastomeric paint. These paints are specifically formulated to handle the expansion and contraction that occurs with temperature changes. They also resist cracking and peeling better than regular interior paint. When it comes to color, think about your overall room scheme. If your living space is bright and airy, a darker fireplace can create a striking focal point. But if your room feels dark, lighter colors might help open it up. Consider the amount of light your fireplace receives throughout the day. A warm, earthy tone might look great in a cozy setting, while a cooler gray could complement a modern design better. Don't forget to test your color choice on a small area first. You can buy sample sizes to see how it looks in different lighting conditions. Sometimes what looks good in the store doesn't translate well to your actual space.
Related Posts

Unveiling the Timeless Charm of Black and White Striped Patio Um

Unpacking the Truth About Walking on Pool Covers Your Essential

Mastering the Art of the Perfect Pool Party Experience A Guest's Guide

Understanding the Pink Slime in Your Pool What It Is and How to Tackle It

Keeping Your Concrete Patio Happy and Safe Around the Fire Pit

Transforming Your Corner Lot A Masterclass in Curb Appeal
Application Techniques for Professional Results
The actual painting process requires some skill and patience. Start by cutting in along the edges using a brush. This creates a clean line between the painted area and the untouched surfaces. Work in thin coats rather than thick ones. Multiple thin layers usually produce better results than trying to get it right in one go. Allow each coat to dry completely before applying the next one. This prevents streaking and ensures even coverage. Roll the paint in a W-pattern to ensure even distribution. Pay extra attention to textured areas where paint can pool in certain spots. For smooth surfaces, use long, steady strokes in one direction. Don't rush the process. If you're feeling tired or frustrated, take a break. It's better to do it slowly and correctly than to rush and make mistakes. Some painters prefer to use a spray gun for large areas, but for most homeowners, brushes and rollers work perfectly fine. The key is to stay consistent with your technique and not to worry too much about perfection.
Finishing Touches and Maintenance Tips
Once your paint is dry, it's time to admire your work. But the job isn't quite finished yet. Remove the masking tape carefully while the paint is still slightly tacky to avoid peeling. Clean up any paint splatters or drips immediately. You might want to add a clear protective coating if your fireplace sees heavy use. This can help extend the life of your paint job and make cleaning easier. Consider adding a fresh coat of paint every few years, depending on wear and tear. Regular dusting and gentle cleaning with a soft cloth will keep your fireplace looking its best. If you notice any chips or scratches, touch them up promptly to prevent further damage. Remember that fireplaces are exposed to heat and humidity, so choosing durable, heat-resistant paint is crucial for longevity. A little maintenance goes a long way in preserving your investment.
Repainting your fireplace doesn't have to be intimidating or expensive. With the right approach, quality materials, and a bit of patience, you can achieve results that rival professional work. The key is taking time to prepare properly, choosing the right paint for your specific situation, and applying it with care. Don't overlook the importance of preparation - it's often the difference between a mediocre job and a truly impressive result. Remember that this is an investment in your home's appearance and comfort. A freshly painted fireplace can transform your entire living space, making it feel more welcoming and updated. Whether you're tackling a small corner or a full fireplace renovation, following these steps will set you up for success. Take your time, enjoy the process, and celebrate your accomplishment when you're done. Your friends and family will notice the difference, and you'll feel proud of the work you've done.
