
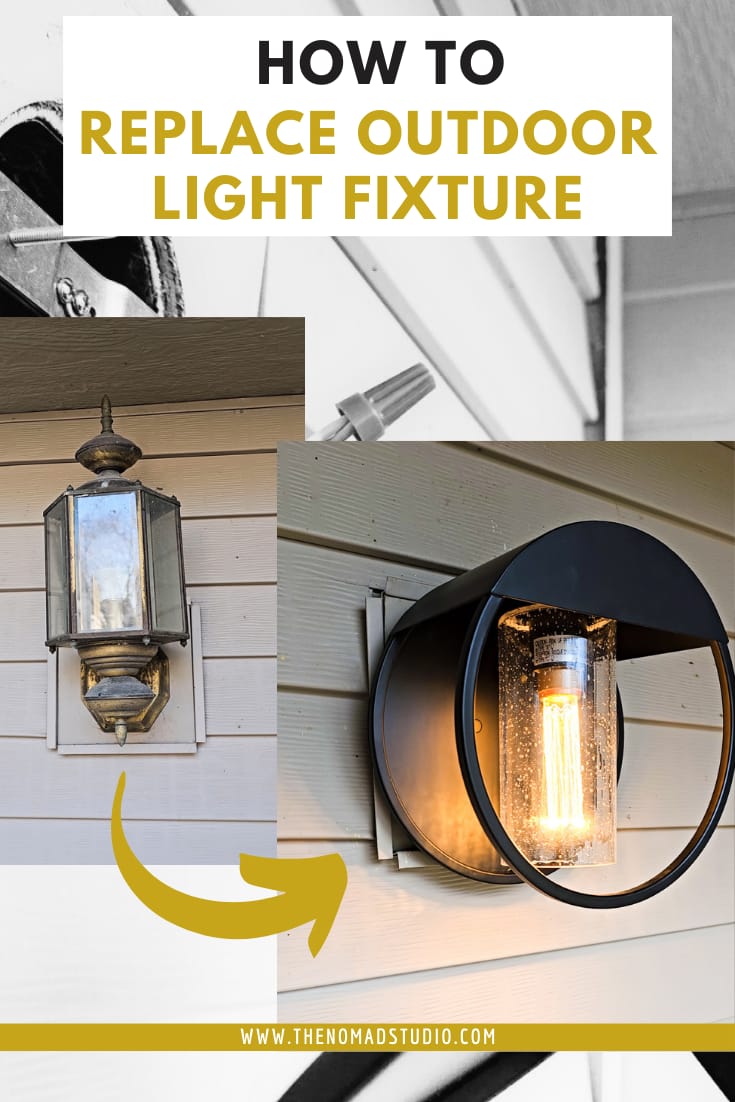
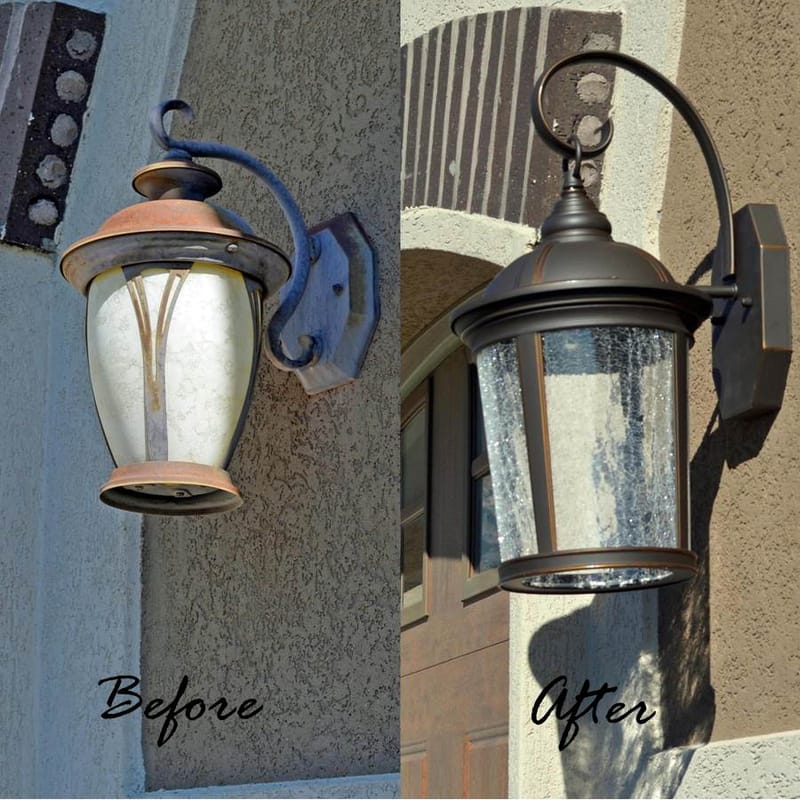
There's something deeply satisfying about replacing an old, weathered outdoor light fixture with something fresh and functional. Whether your current fixture is flickering, broken, or just looks outdated, swapping it out can transform your entire home's curb appeal. But before you dive in, there are some important steps to follow. This guide will walk you through everything you need to know to complete this project safely and successfully.
Outdoor lighting isn't just about function – it's about creating atmosphere and safety. When your outdoor fixture starts showing signs of wear or simply doesn't match your updated home aesthetic, it's time for a replacement. Many homeowners feel intimidated by electrical work, but with the right approach and preparation, replacing an outdoor light fixture can be straightforward. The key is understanding the basics and taking your time. You'll want to consider not just the new fixture itself, but also the electrical connections, mounting hardware, and local codes that might apply to your area.

Safety First: Essential Precautions
Before touching anything electrical, always prioritize safety. Turn off the power at the breaker box. You can verify the power is off using a voltage tester. These devices cost less than $20 and are worth every penny. Don't assume a switch is off – some fixtures have multiple switches or are controlled by timers. When working outdoors, be aware of weather conditions. Rain or wet surfaces increase electrical hazards significantly. If you're uncomfortable handling electrical work, hiring a licensed electrician is always a smart choice. Even experienced DIYers often prefer to call professionals for complex installations or when dealing with older homes that may have outdated wiring.
Tools You'll Need for the Job
Having the right tools makes all the difference. Here's what to gather before starting:
Some projects might require additional items like a drill for mounting screws or a wrench for removing old fixtures. Don't forget to check if your new fixture comes with mounting hardware. Sometimes, especially with older homes, you'll find that the existing bracket doesn't quite match the new fixture's requirements. It's better to be prepared than to realize you're missing something halfway through.
Understanding Your Old Fixture
Take your time examining what you're replacing. Note how many wires connect to the fixture and their colors. Most commonly, you'll see black (hot), white (neutral), and green or bare copper (ground). Some fixtures might have additional wires for dimming or different light sources. Take photos before disconnecting anything. This helps ensure you reconnect everything correctly. Pay attention to the fixture's weight and mounting style. Heavy fixtures require sturdy mounting brackets. Also, note whether the fixture is flush-mounted or requires a canopy. Understanding these details prevents frustrating mistakes later on.
Preparing for Installation
Related Posts

Unveiling the Timeless Charm of Black and White Striped Patio Um

Unpacking the Truth About Walking on Pool Covers Your Essential

Mastering the Art of the Perfect Pool Party Experience A Guest's Guide

Understanding the Pink Slime in Your Pool What It Is and How to Tackle It

Keeping Your Concrete Patio Happy and Safe Around the Fire Pit

Transforming Your Corner Lot A Masterclass in Curb Appeal
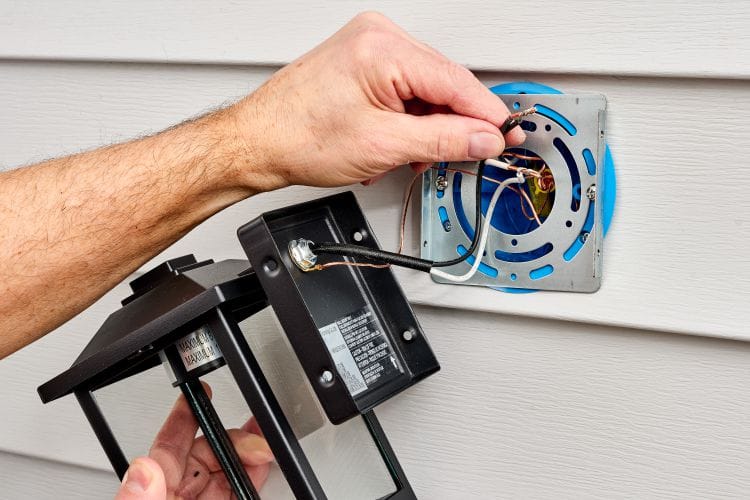
Once you've confirmed the power is off, remove the old fixture carefully. Start by unscrewing the decorative cover or globe. Then loosen the mounting screws holding the fixture to the electrical box. Gently pull the fixture away from the wall, being careful not to damage the wires. If the fixture is heavy, ask someone to help hold it while you work. Check the electrical box to make sure it can support your new fixture. If you're installing a heavier fixture, you might need to reinforce the box or install a new one. Look for any signs of damage to the electrical box or wiring itself. If you notice corrosion or worn insulation, that's a sign of potential problems that might need addressing.
Connecting the New Fixture
Matching wire colors properly is crucial. Black wire typically connects to black, white to white, and green/bare to green/bare. If your new fixture has a ground wire but the old one didn't, you can still connect it to the grounding system if available. Some modern fixtures include LED bulbs and may have different wiring requirements. Follow the manufacturer's instructions carefully, as they often provide specific guidance for your model. If you're unsure about any connection, consult the wiring diagram included with the fixture. It's better to spend extra time getting connections right than to risk a short circuit or fire hazard.
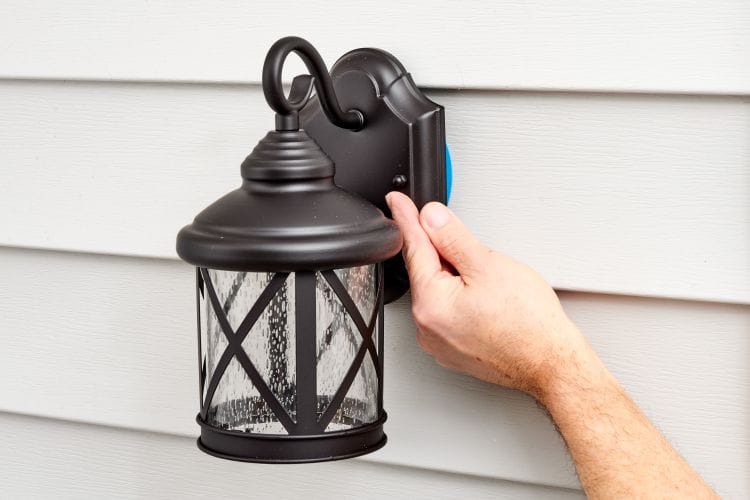
Mounting and Finishing Touches
After connecting the wires, secure the fixture to the mounting bracket. Make sure all connections are tight and properly insulated with electrical tape. If your fixture has a canopy, attach it according to the manufacturer's directions. Most outdoor fixtures come with detailed installation guides. Once everything is secured, test the fixture by turning the power back on. If it doesn't work immediately, double-check all connections. Some fixtures might require specific bulb types or wattage limits. Make sure you're using bulbs that match the fixture's specifications. Finally, clean up your work area and dispose of the old fixture properly. Many hardware stores offer take-back programs for old fixtures.
Replacing an outdoor light fixture is a manageable project that can dramatically improve your home's appearance and functionality. The key is preparation, safety, and patience. Taking your time to understand the electrical connections and following proper procedures makes all the difference between a successful installation and a frustrating experience. Remember, if you ever feel uncertain about any part of the process, don't hesitate to seek professional help. A little caution goes a long way in preventing accidents and ensuring your new fixture works perfectly for years to come. With the right approach, this simple upgrade can make your home feel fresh and welcoming while enhancing outdoor safety and comfort.
