
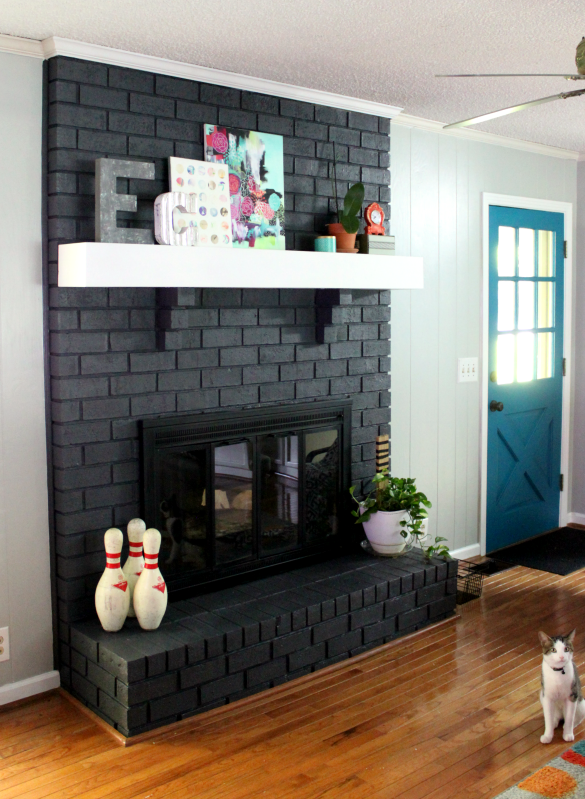
There's something incredibly appealing about combining classic brick with modern tile. Whether you're updating your living room or adding character to your family room, covering a brick fireplace with tile can create a stunning focal point. But how do you actually pull off this transformation? What challenges might you face? And what's the best approach for ensuring your project succeeds?
Let's face it - brick fireplaces have that timeless charm that never goes out of style. But sometimes, you want to add a fresh twist to your space. Installing tile over an existing brick fireplace is one way to breathe new life into your room while maintaining the structural integrity of your hearth. This approach combines the rustic appeal of brick with the sleek sophistication of tile. It's not just about aesthetics though; it's also about functionality and durability. The right tile installation can protect your brick surface, provide better heat resistance, and even improve the overall energy efficiency of your fireplace area.
Why Choose Tile Over Brick?
There are several compelling reasons why someone might opt to install tile over their existing brick fireplace. First, tile offers much more design flexibility than brick alone. You can choose from countless colors, textures, and patterns to match your home's aesthetic perfectly. Whether you prefer the clean lines of subway tile, the warmth of natural stone, or the modern look of large-format porcelain, the options are nearly endless.
Tile also tends to be easier to clean and maintain than brick. While brick may require special cleaning products and techniques to avoid damage, tile can typically be wiped down with standard household cleaners. Plus, if you ever want to change the look of your fireplace again, tile is much easier to update than repainting or re-staining brick.
From a practical standpoint, tile can also offer better protection against moisture and heat. Many people find that their brick fireplaces develop small cracks or chips over time, especially around the edges. Tile provides a seamless, protective layer that helps prevent further deterioration.
Preparation Essentials
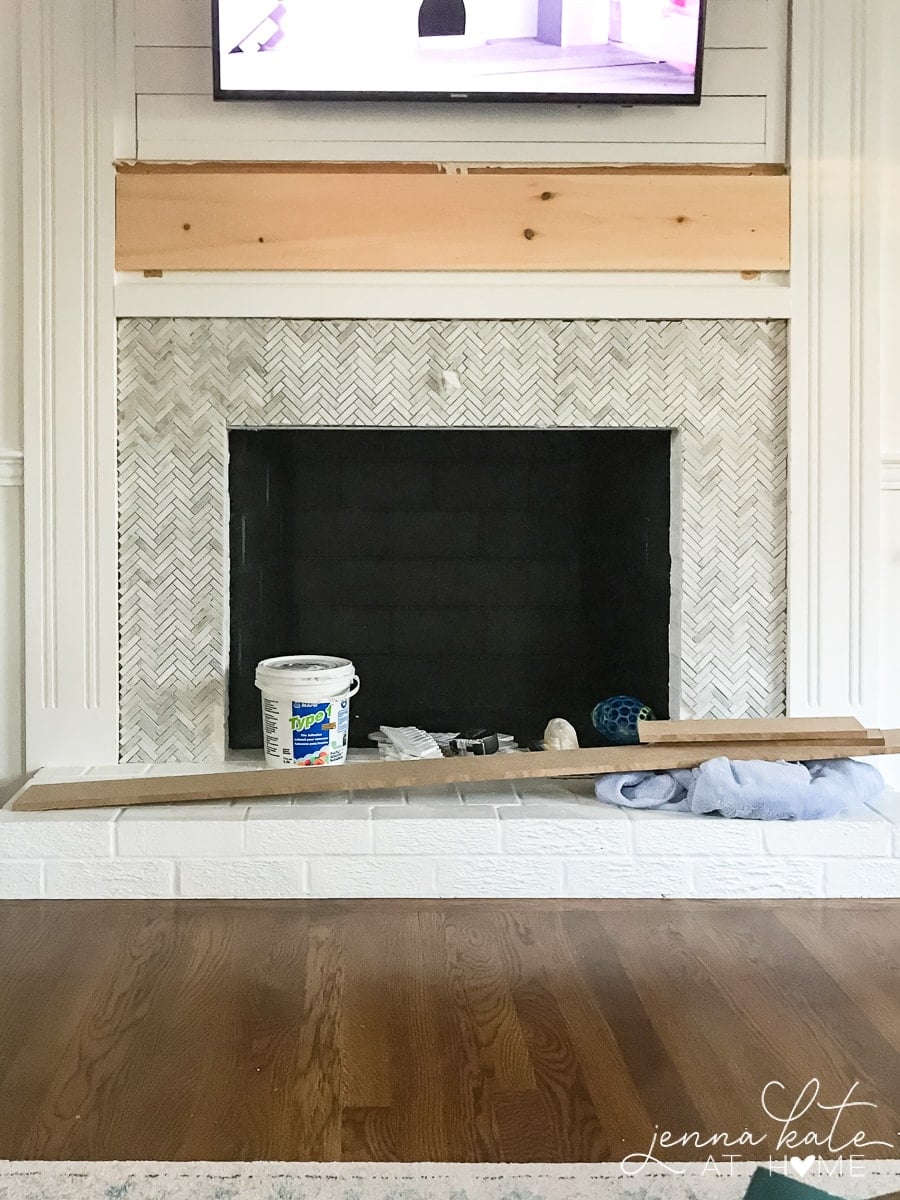
Before you even think about laying tile, proper preparation is absolutely crucial. Start by thoroughly cleaning the brick surface to remove all dirt, grease, and loose particles. Use a wire brush or power washer if necessary, but be gentle to avoid damaging the brick itself.
Check for any cracks, holes, or areas where the brick might be loose. These need to be repaired before tiling. Small gaps can be filled with appropriate mortar or epoxy, while larger sections may require partial replacement.
It's also important to assess the condition of your brick. If it's severely deteriorated or unstable, you might need to consult with a professional contractor. The surface needs to be solid enough to support the additional weight of tile and adhesive.
Another critical step is ensuring proper ventilation. If you're working in a space where the fireplace is used regularly, consider temporarily shutting it down during installation. This prevents dust and debris from spreading throughout your home.
Choosing the Right Tile
The type of tile you select will significantly impact both the look and performance of your project. For fireplace applications, you'll want materials that can handle heat and temperature changes. Ceramic and porcelain tiles are popular choices because they're durable and come in many styles.
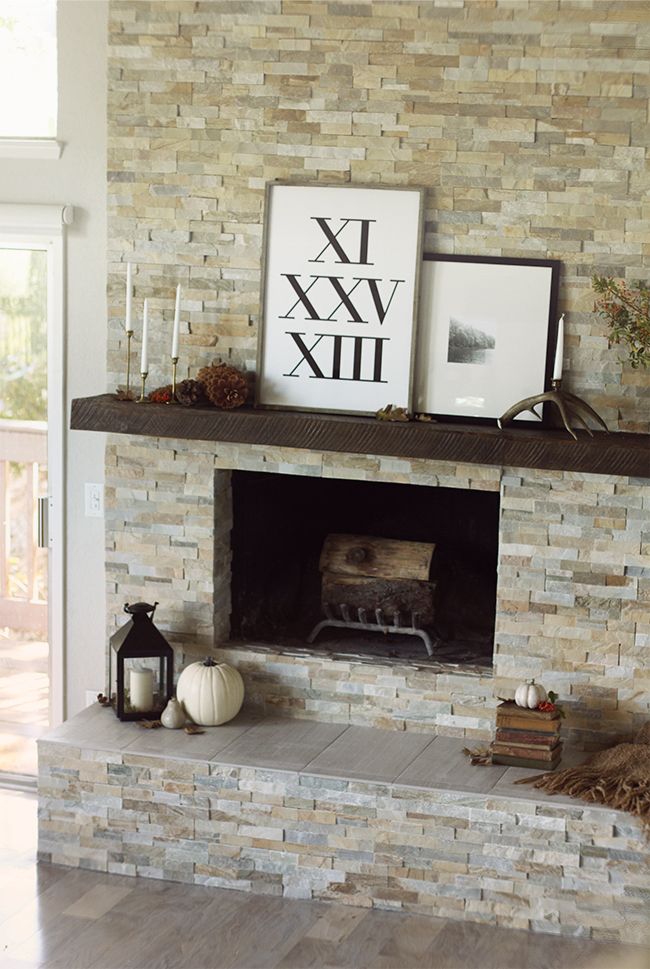
Natural stone tiles like slate or travertine offer that premium look but require more maintenance and sealing. They're also more expensive than ceramic options.
Consider the size of your fireplace when choosing tile dimensions. Larger tiles can make a small space feel bigger, while smaller tiles work well for detailed work or intricate patterns.
Thickness matters too. Most residential installations use 1/4-inch to 1/2-inch thick tiles. Thicker tiles provide better durability but may require additional structural support.
Don't forget about slip resistance. Even though this is a decorative application, safety should always be a consideration, especially in homes with children or elderly residents.
Essential Tools and Materials
Having the right tools makes all the difference in a successful tile installation. Here's what you'll typically need:
Adhesive is another crucial component. Choose a high-quality thin-set mortar specifically designed for wall applications. Some products are formulated for use near heat sources, which is ideal for fireplace projects.
Grout selection depends on your tile type and desired appearance. Sanded grout works well for wider joints, while unsanded grout is better for narrower spaces.
You'll also need spacers to keep tile joints consistent, and a sealer if you're using natural stone tiles. These products protect against stains and moisture.
Installation Process Breakdown
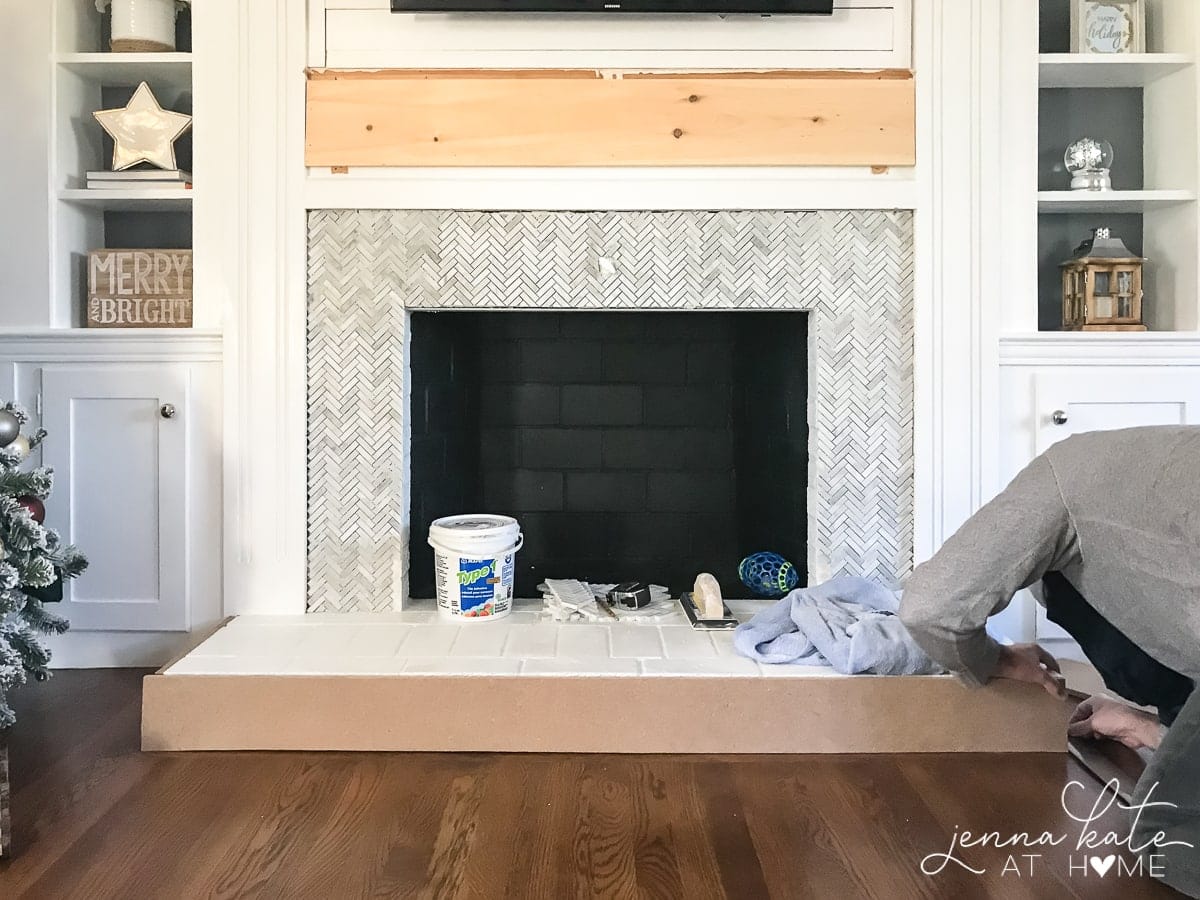
The actual installation process involves several key steps that must be completed carefully. First, create a layout plan to determine where each tile will go. This helps ensure symmetry and prevents awkward cut pieces in prominent areas.

Apply adhesive to small sections of the brick surface, then press tiles firmly into place. Work systematically across the entire area, allowing the adhesive to set according to manufacturer instructions.
Cut tiles as needed using your tile cutter or wet saw. Measure twice, cut once - this adage really applies here! Take your time with measurements to avoid costly mistakes.
Once all tiles are in place, let the adhesive cure completely before applying grout. This usually takes 24 hours, though some products dry faster.
After grouting, clean excess grout from tile surfaces with a damp sponge. Be careful not to remove grout from the joints themselves.
Finally, allow the grout to cure fully before using the fireplace normally. This typically requires at least 48-72 hours.
Common Challenges and Solutions
Even experienced DIYers encounter obstacles when tiling over brick. One major issue is uneven surfaces. Brick isn't perfectly flat, and this can cause tiles to sit at different heights. Using a self-leveling compound or selecting flexible adhesive can help address this.
Moisture problems can occur if the brick wasn't properly cleaned or sealed beforehand. Always check for water penetration issues before starting. If you notice any signs of moisture, investigate and resolve them first.
Temperature fluctuations can cause tile to expand and contract, potentially leading to cracking. This is especially true for natural stone tiles. Using flexible grouts and allowing proper expansion joints can minimize this risk.
Another common challenge is matching existing brick texture. Sometimes the transition between brick and tile can look jarring. Consider using border tiles or creating a gradual transition zone to soften the visual shift.
Maintenance and Longevity Tips
Once installed, tile over brick fireplaces require minimal upkeep compared to bare brick. Regular cleaning with mild soap and water usually suffices for most tile types. Avoid harsh chemicals that could damage the surface or grout.
For natural stone tiles, periodic sealing is recommended to maintain protection. Check manufacturer guidelines for specific care requirements.
Keep an eye on grout lines for signs of wear or staining. Early treatment prevents deeper penetration and easier removal later.
If you notice any loose tiles or damaged grout, address these issues promptly to prevent further deterioration. Small repairs are much easier than major renovations.
Consider the fireplace's usage patterns when planning maintenance schedules. High-traffic areas or frequently used fireplaces may need more frequent attention.
Cost Considerations
The cost of installing tile over a brick fireplace varies widely based on several factors. Size of the area being tiled directly impacts material and labor costs. A small accent wall will cost less than a full fireplace surround.
Tile prices range from budget-friendly ceramic options to premium natural stone. Expect to pay anywhere from $3 to $20 per square foot depending on your choices.
Labor costs depend on complexity and whether you hire professionals or tackle the job yourself. Professional installation can add $50-$100 per hour to your total project cost.
Additional expenses might include repair work for damaged brick, specialized tools, or extra materials for difficult cuts. Budget 10-15% extra for unexpected issues.
While the initial investment seems high, tile installations often increase home value and provide decades of reliable service. The long-term benefits usually outweigh the upfront costs.
Installing tile over a brick fireplace can transform your space in ways that blend traditional charm with contemporary style. The key lies in proper preparation, thoughtful material selection, and careful execution. Whether you're a seasoned DIYer or someone looking to tackle this project for the first time, understanding the process and potential challenges will lead to better results.
Remember that this isn't just about aesthetics - it's also about functionality and longevity. Good tile work over brick can last for decades with proper care. The investment you make now pays dividends in beauty and practicality for years to come.
Don't rush the process. Take time to plan, prepare, and execute each step thoughtfully. When done correctly, your new tile-over-brick fireplace will become a stunning centerpiece that you'll enjoy for generations.


