
When you think about outdoor spaces, nothing quite beats the look of properly laid pavers. Whether you're building a new patio, driveway, or walkway, getting those stones just right matters. But how do you make sure they sit perfectly flat? The answer lies in using sand - specifically, the right kind of sand and the proper technique. This isn't just about throwing sand around willy-nilly. It's a methodical process that requires understanding, patience, and the right approach.
Picture this: you've carefully planned your outdoor project, selected beautiful pavers, and now you're ready to lay them down. Everything seems to be going smoothly until you realize that some stones are higher than others, creating an uneven surface that looks less than perfect. You might have heard that sand can help solve this problem, but how exactly does one go about leveling pavers with sand? It's actually simpler than you might think, though it does require attention to detail. The key is in choosing the right type of sand, preparing your base correctly, and applying the sand with precision. Let's dive into the nitty-gritty of this essential skill.
Understanding the Foundation
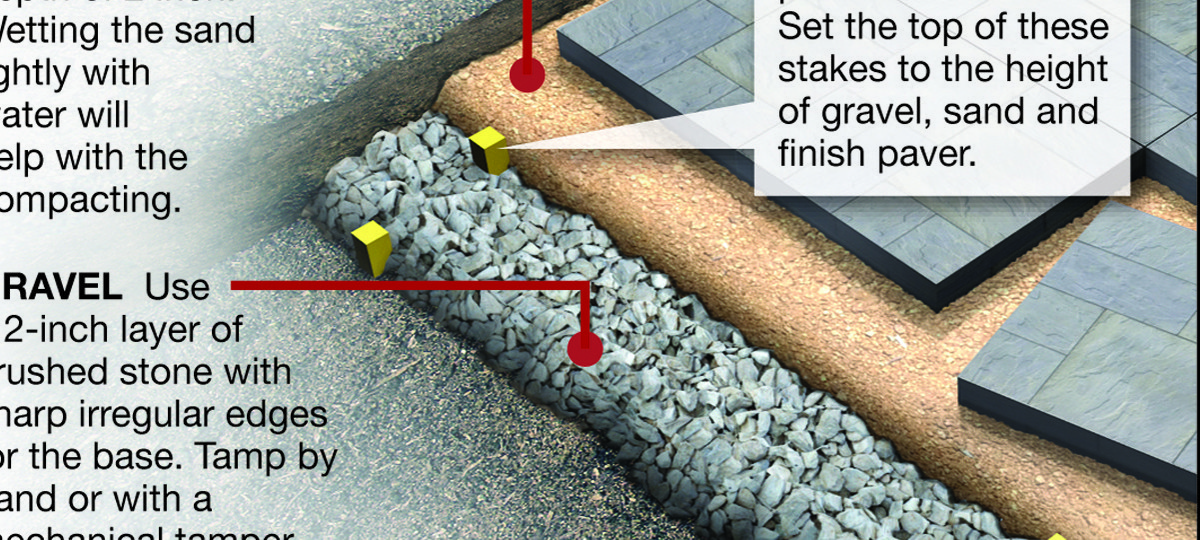
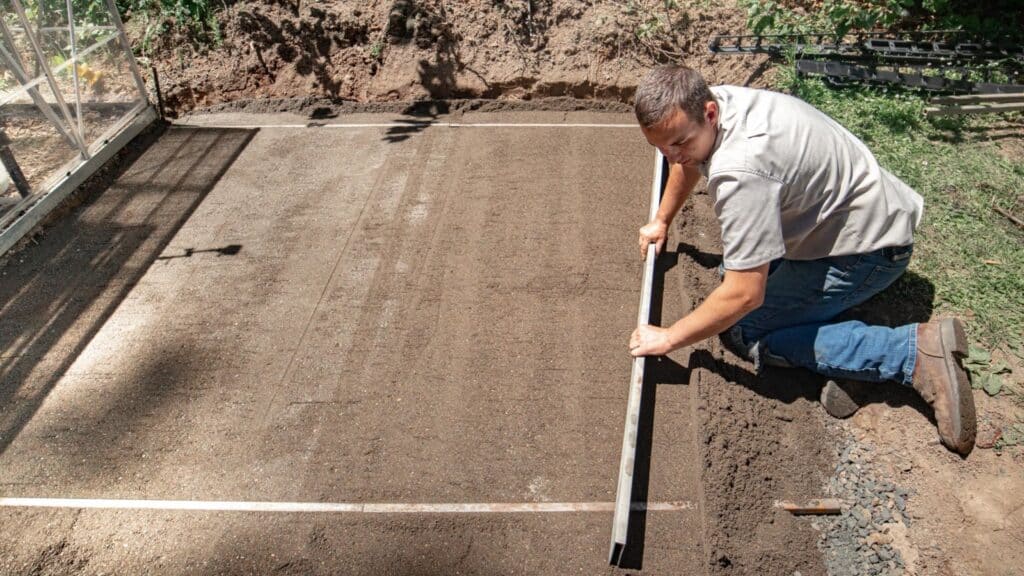
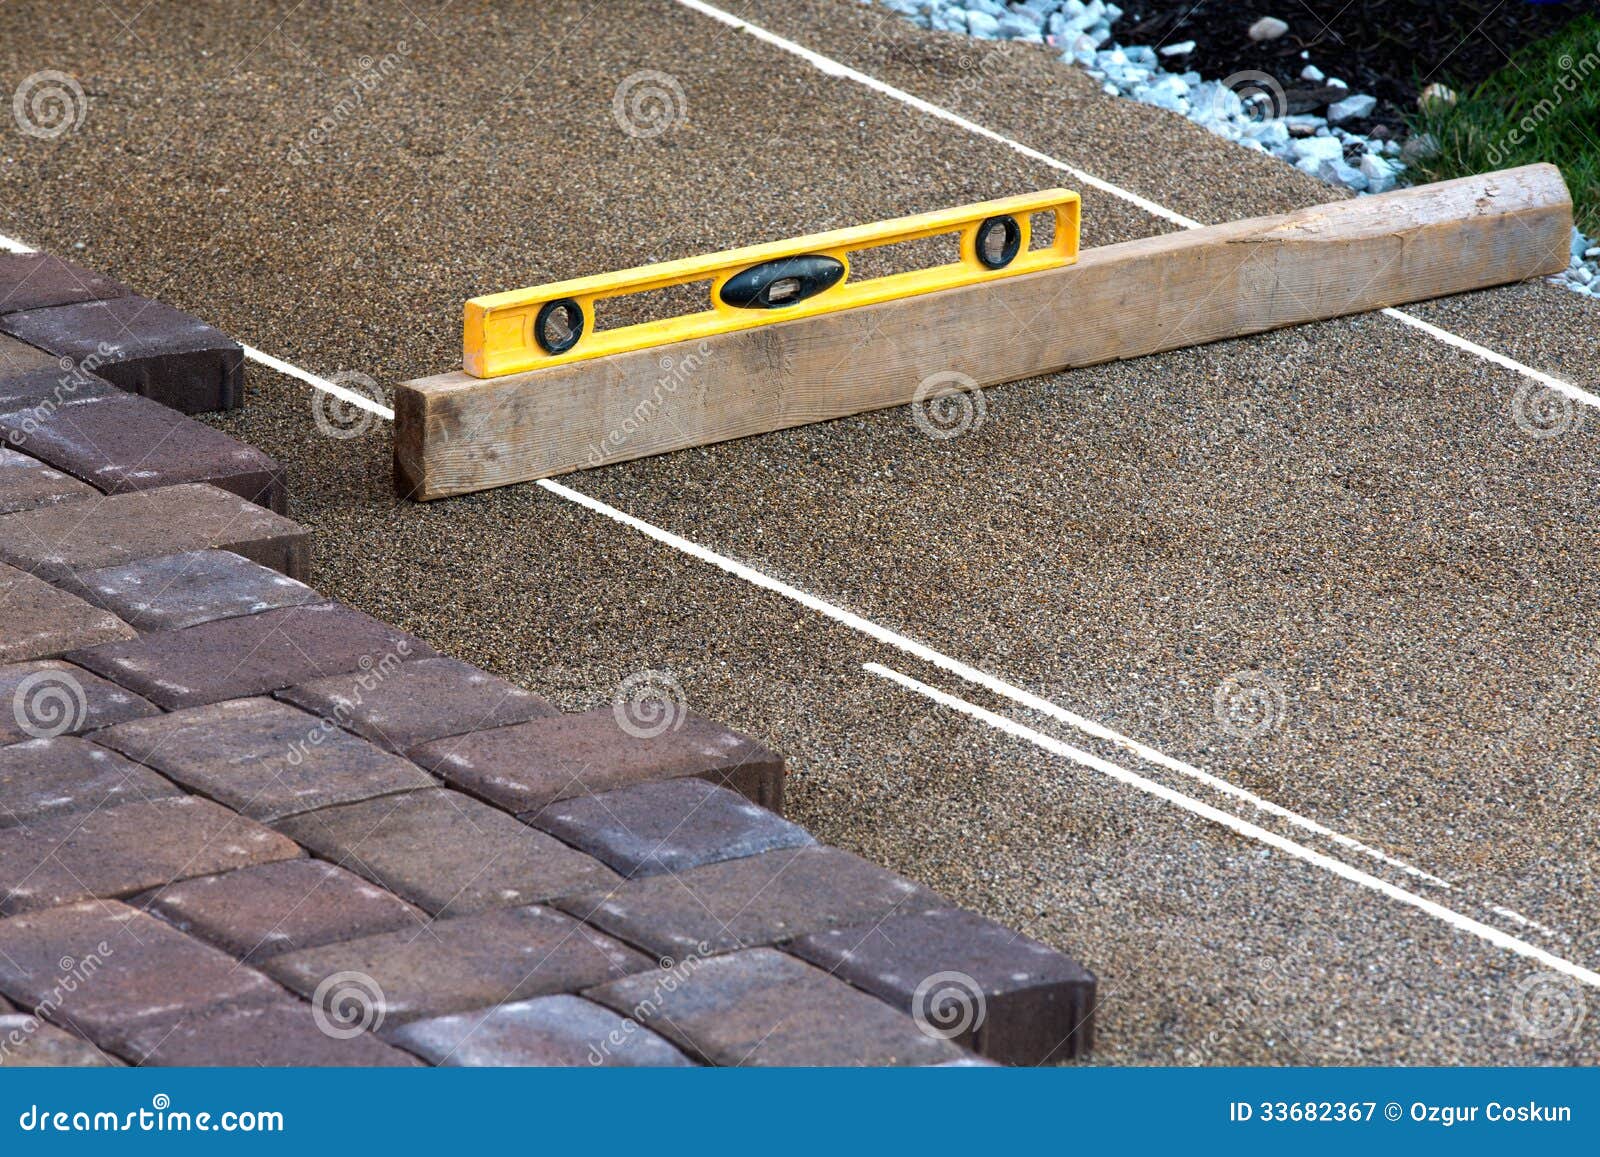
Before we even think about sand, you need to understand that pavers rely heavily on their foundation. Think of it like building a house - if the foundation isn't solid, everything above it will be unstable. The first step in leveling pavers is ensuring your base is properly prepared. Start by clearing the area of debris, vegetation, and loose soil. Then, compact the ground thoroughly using a hand tamper or mechanical compactor. This creates a stable platform for your pavers to rest on. The base layer should be made of crushed stone or concrete sand, approximately 4 inches thick. Once that's done, you're ready to move to the next step. Without a proper foundation, no amount of sand will fix the problem later on.
Choosing the Right Sand Type
Not all sands are created equal when it comes to leveling pavers. You'll want to select fine sand specifically designed for masonry work or paver installation. This type of sand is typically finer than regular beach sand and has consistent grain size. It's important to avoid using coarse sand or beach sand because these won't settle properly between the pavers. Fine sand allows for better adjustment and ensures that gaps between stones are filled evenly. Some professionals prefer to use polymeric sand, which contains additives that help bind the sand together once it's wetted. This type of sand offers extra stability and prevents weeds from growing between the pavers. The key is consistency - your sand should be uniform in texture and free from large rocks or clumps that could cause problems later.
Preparing Your Paver Surface
Once your base is set, it's time to place your pavers. Lay them out in your desired pattern before actually installing them. This gives you a chance to see how they fit together and identify any stones that might be too big or small for their spots. When placing the pavers, make sure they're touching each other slightly, leaving a small gap of about 1/8 inch between edges. This gap will be filled with sand later. Use a rubber mallet to gently tap the pavers into place, making sure they're flush with each other. If you notice any high spots or low areas immediately after placement, this is where sand comes in handy. Don't worry about perfect alignment at this stage - focus on getting the stones positioned correctly. The sand will handle the final adjustments.
Applying the Sand Correctly
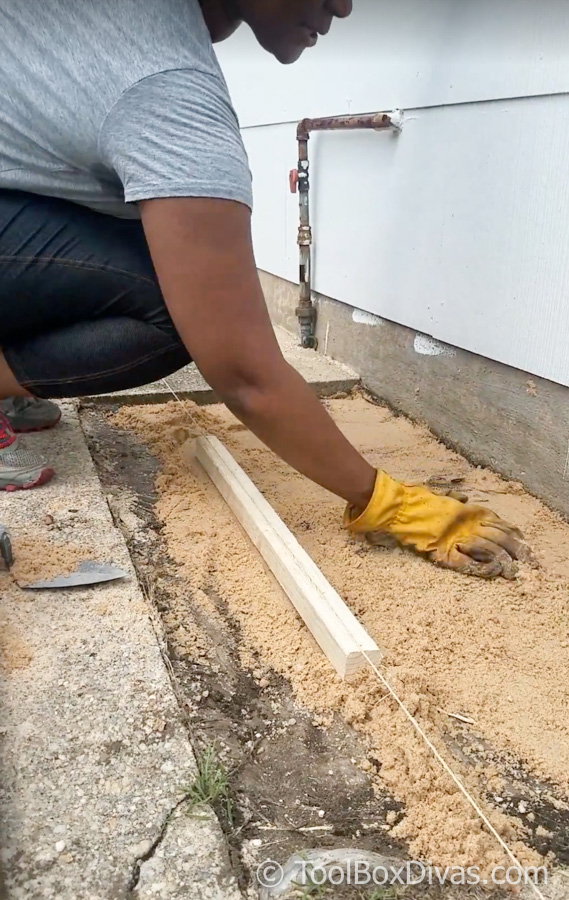
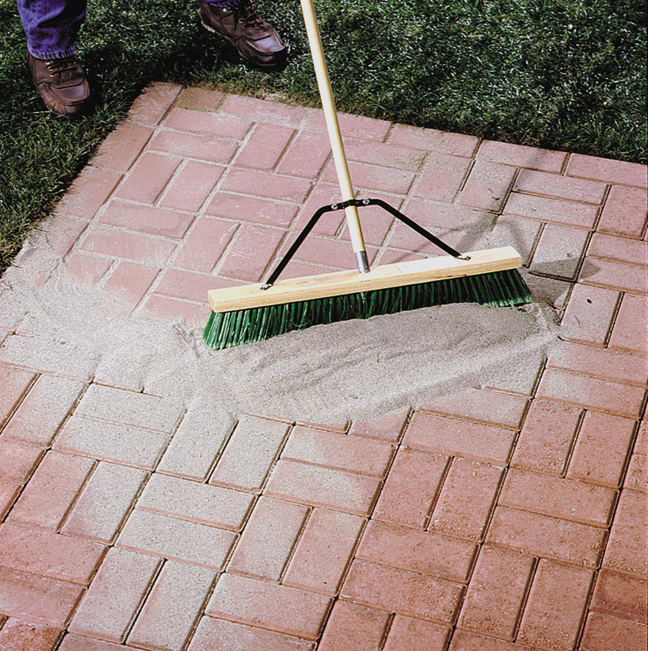
Now comes the part where many people get confused. The sand application isn't just about dumping sand everywhere. Instead, it's a careful process. First, spread a thin layer of sand over the entire surface of your pavers. The layer should be roughly 1/4 inch deep. Use a rake or broom to distribute the sand evenly across the top of the pavers. Then, use a vibratory plate compactor or simply tap the pavers gently with a rubber mallet to let the sand settle into the gaps between stones. Work in sections, moving from one side of the area to another. The sand should begin to fill the spaces between pavers, helping to level any discrepancies in height. Be patient during this process - rushing can lead to uneven results. Sometimes it takes several passes to get everything just right.
Fine-Tuning the Leveling Process
After you've applied the initial layer of sand, it's time for the real work of leveling. Check your pavers regularly using a straight edge or level to see where adjustments are needed. If you notice a few high spots, you can remove sand from those areas using a shovel or scoop. For low spots, add more sand and tamp it down again. This back-and-forth process continues until all pavers are sitting at the same height. Some people find it helpful to use a spirit level along the edge of each paver to check for consistency. Remember that it's easier to add sand than remove it, so when in doubt, add a little extra. Also, consider using a small garden hose to lightly dampen the sand - this helps it settle more effectively and creates better contact between the pavers and sand. The key is to keep checking frequently and making small adjustments rather than trying to fix everything at once.
Final Steps and Maintenance
Once you've achieved the desired level, it's time to finish up. Sweep any excess sand off the surface of the pavers to prevent it from accumulating in unwanted places. You can also use a leaf blower to help clear away loose particles. After the sand has settled, consider applying a light mist of water to help the sand bind together better. This is especially important if you're using polymeric sand. Allow the area to dry completely before walking on it or placing furniture. Finally, it's worth noting that this process may need to be repeated periodically as weather conditions and settling occur over time. Regular maintenance keeps your paver installation looking fresh and professional. Many homeowners find that doing a quick sand refresh every year or two helps maintain the appearance and functionality of their outdoor space.
Leveling pavers with sand might seem like a simple task, but it's really an art form that combines science and craftsmanship. It requires patience, attention to detail, and the right materials. From preparing the base to applying the final touches, each step builds upon the last to create a seamless, even surface. The beauty of this method is that it's forgiving enough for beginners while still allowing experienced installers to achieve professional results. Whether you're tackling a small patio or a large driveway, mastering the sand leveling technique will serve you well in future projects. Remember, the goal isn't perfection in one try - it's consistency and care throughout the process. With practice and attention to these fundamentals, anyone can learn to level pavers with confidence. The satisfaction of seeing a perfectly flat, attractive surface is well worth the effort required to achieve it. Just don't forget to take breaks and enjoy the process - after all, you're creating something beautiful for yourself and your family to enjoy.


