
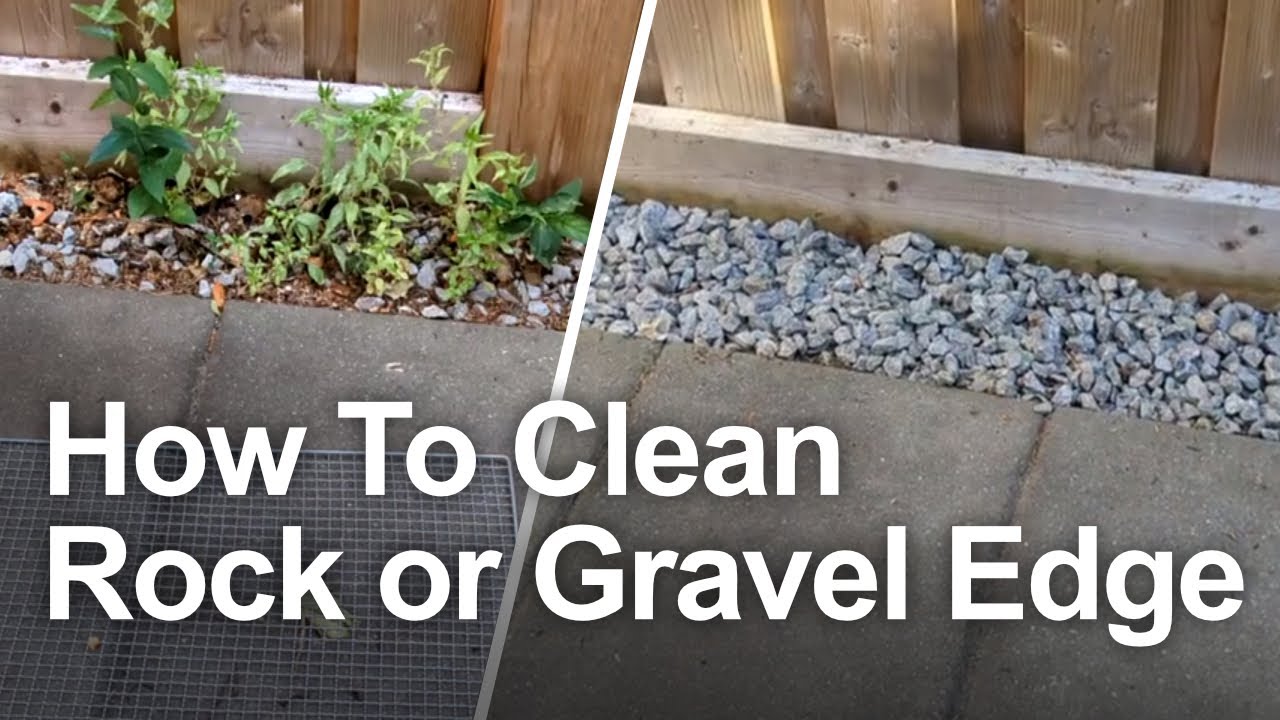
Imagine walking through a garden where every stone gleams with clarity, every pebble catches the light, and your landscape design truly shines. That's what happens when you properly clean rocks for landscaping. Whether you're working with river stones, flagstone, or decorative aggregates, the right cleaning techniques can make all the difference between a mediocre garden and a masterpiece.
Cleaning rocks for landscaping isn't just about aesthetics—it's about creating a foundation for lasting beauty. When rocks are dirty, they can look dull, uninviting, and completely out of place in your carefully planned outdoor space. But when you take the time to properly clean them, you're not just improving their appearance; you're enhancing their natural characteristics and ensuring they blend seamlessly with your landscape vision.
This guide will walk you through everything you need to know about rock cleaning, from basic methods to advanced techniques. We'll cover different types of rocks, common challenges, and practical solutions that anyone can implement. Whether you're a seasoned landscaper or a DIY enthusiast, these insights will help you achieve professional-quality results.
Understanding Different Types of Rocks
Not all rocks are created equal, and understanding their unique properties is crucial for proper cleaning. Each type responds differently to various cleaning methods, so knowing what you're working with makes all the difference.
Natural stones like granite, limestone, and sandstone have porous surfaces that can absorb dirt, moss, and mineral deposits. These stones often benefit from gentle cleaning approaches to avoid damage. River rocks tend to be smoother and may carry more organic matter, while flagstone and similar materials might have more varied textures.

Consider the stone's hardness and porosity before choosing a cleaning method. Soft stones like limestone require gentler treatment than harder materials like granite. Some rocks may even have mineral stains that need special attention.
The key is matching your cleaning approach to the rock's characteristics. A technique that works perfectly on one type might be too harsh for another.
Essential Tools and Materials
Before diving into cleaning, gather the right tools and supplies. You'll want to prepare a few basic items to make the process efficient and effective:
The pressure washer is often the most powerful tool, but it requires careful handling to avoid damaging delicate stones. Start with lower pressure settings and work your way up if needed.
For smaller projects or delicate rocks, manual cleaning with brushes and mild solutions works beautifully. The right combination of tools ensures you can tackle any cleaning challenge without compromising the integrity of your stones.

Basic Cleaning Methods
Starting with simple methods helps build confidence and prevents accidentally damaging your rocks. Here are some fundamental approaches that work well for most situations:
Rinsing and brushing: This basic technique removes loose dirt, leaves, and surface debris. Use a soft brush to gently scrub away visible grime. This is often sufficient for lightly soiled stones.
Vinegar solution: Mix white vinegar with water in a 1:1 ratio for tackling mineral deposits and hard water stains. Apply the mixture, let it sit for 10-15 minutes, then rinse thoroughly. Vinegar naturally breaks down calcium deposits and other mineral buildup.
Baking soda paste: For stubborn stains, create a paste using baking soda and water. Apply to problem areas, let it dry, then scrub and rinse. This method works particularly well on organic stains and light discoloration.
These foundational techniques form the backbone of successful rock cleaning. They're gentle enough for regular maintenance while still effective against common issues.
Advanced Cleaning Techniques
When basic methods aren't enough, it's time to bring out the big guns. Advanced techniques can handle serious dirt, moss, and stubborn stains that simple cleaning can't resolve.
Pressure washing: This method uses high-pressure water to blast away dirt, algae, and moss. It's incredibly effective but requires caution. Start with low pressure and gradually increase if needed. Always keep the nozzle at least 12 inches from the rock surface.
Chemical treatments: Specialized stone cleaners can target specific problems like efflorescence (white salt deposits) or deep-set stains. Always read labels carefully and follow manufacturer instructions. Some products require specific safety precautions.
Steam cleaning: This method uses hot steam to loosen dirt and kill mold or mildew. It's excellent for organic growth but may not be suitable for all stone types. Check compatibility before proceeding.
Advanced techniques should complement rather than replace basic methods. They're best used for major cleaning jobs or when dealing with particularly challenging conditions.
Safety Considerations and Precautions
Safety should always come first when cleaning rocks, especially when using chemicals or power equipment. Take a moment to consider potential hazards and how to prevent them.
Wear appropriate protective gear including gloves, safety glasses, and closed-toe shoes. Chemicals can cause skin irritation or respiratory issues if not handled properly. When using pressure washers, be aware that high-pressure water can cause serious injury if it hits skin directly.
Some cleaning solutions can harm plants or soil around your rocks. Always test a small area first and ensure proper drainage. Consider the environmental impact of your chosen methods.
Additionally, certain stones react poorly to specific chemicals. Research your particular rock type before applying any cleaning agents. Some materials may deteriorate quickly if exposed to acidic solutions.
Taking these precautions protects both your health and your investment in the landscape.

Maintenance Tips for Long-lasting Results
Cleaning rocks is just the beginning. Proper maintenance keeps them looking great year after year. Here are strategies to preserve your cleaned rocks:
Think of maintenance as an investment in your landscape's future. Regular care prevents major cleaning projects and keeps your stones looking their best. Many gardeners find that a quick monthly check-in saves hours of intensive cleaning later.
Consider seasonal factors too. Winter weather can cause different types of staining, while summer heat might encourage moss growth. Adjust your maintenance schedule accordingly to stay ahead of these challenges.
Cleaning rocks for landscaping is both an art and a science. It combines practical knowledge with attention to detail to create outdoor spaces that truly shine. Whether you're preparing for a new project or maintaining existing installations, the right cleaning approach transforms ordinary stones into extraordinary elements of your landscape.
Remember that patience and proper technique are more valuable than rushing through the process. Take time to assess each rock's needs, choose appropriate methods, and follow through with consistent maintenance. The effort you invest today pays dividends in the beauty and longevity of your outdoor space.
With these principles in mind, you'll be well-equipped to handle any rock cleaning challenge that comes your way. Your landscape will thank you for the extra care and attention to detail.


