
There's something deeply satisfying about a well-maintained fence that looks like it was made just for your home. But before you even think about applying that fresh coat of stain, there's one crucial step that often gets overlooked. The secret to a stunning fence job lies in how well you prepare the surface. You might wonder why we spend so much time talking about cleaning when it seems like such a simple task. The truth is, a fence that's been properly cleaned will accept stain better, last longer, and look absolutely fantastic for years to come.
When it comes to maintaining your outdoor spaces, few things can transform the look of your property quite like a fresh coat of fence stain. However, many homeowners make a common mistake by rushing straight to the staining process without first giving their fence the thorough cleaning it deserves. This oversight can lead to poor adhesion, uneven coloration, and ultimately, a disappointing result that needs redoing sooner than expected. Think of it this way - would you apply new paint to a dirty wall? Of course not! The same principle applies to fences. Before you even consider staining, you need to make sure your fence is clean and ready to receive that protective coating.
Why Cleaning Is Crucial Before Staining
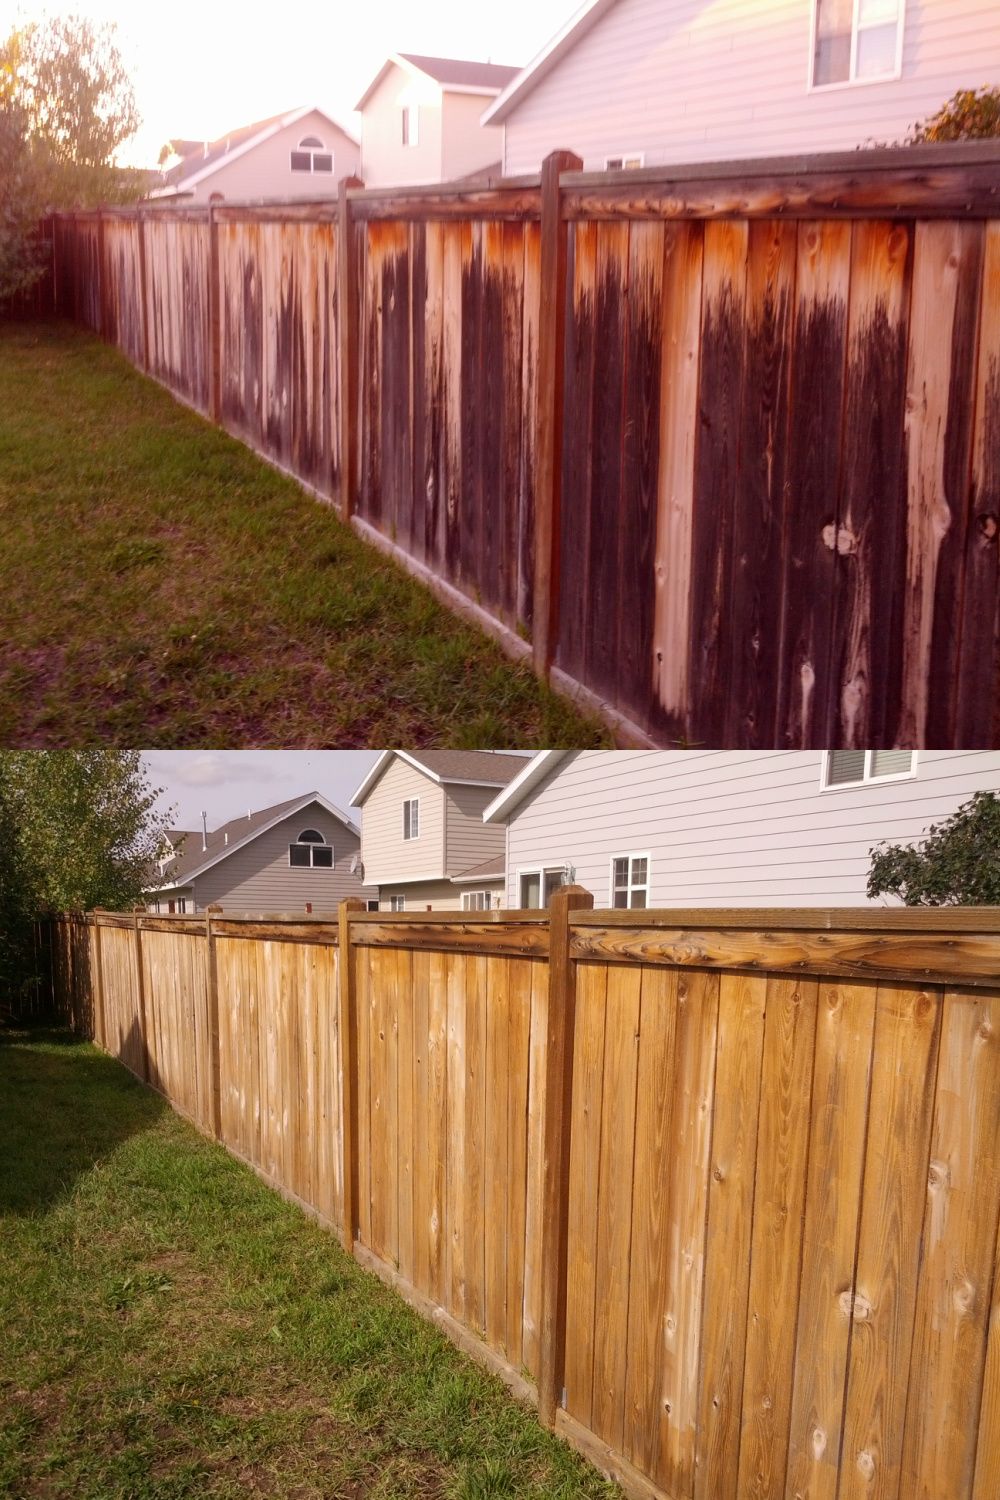
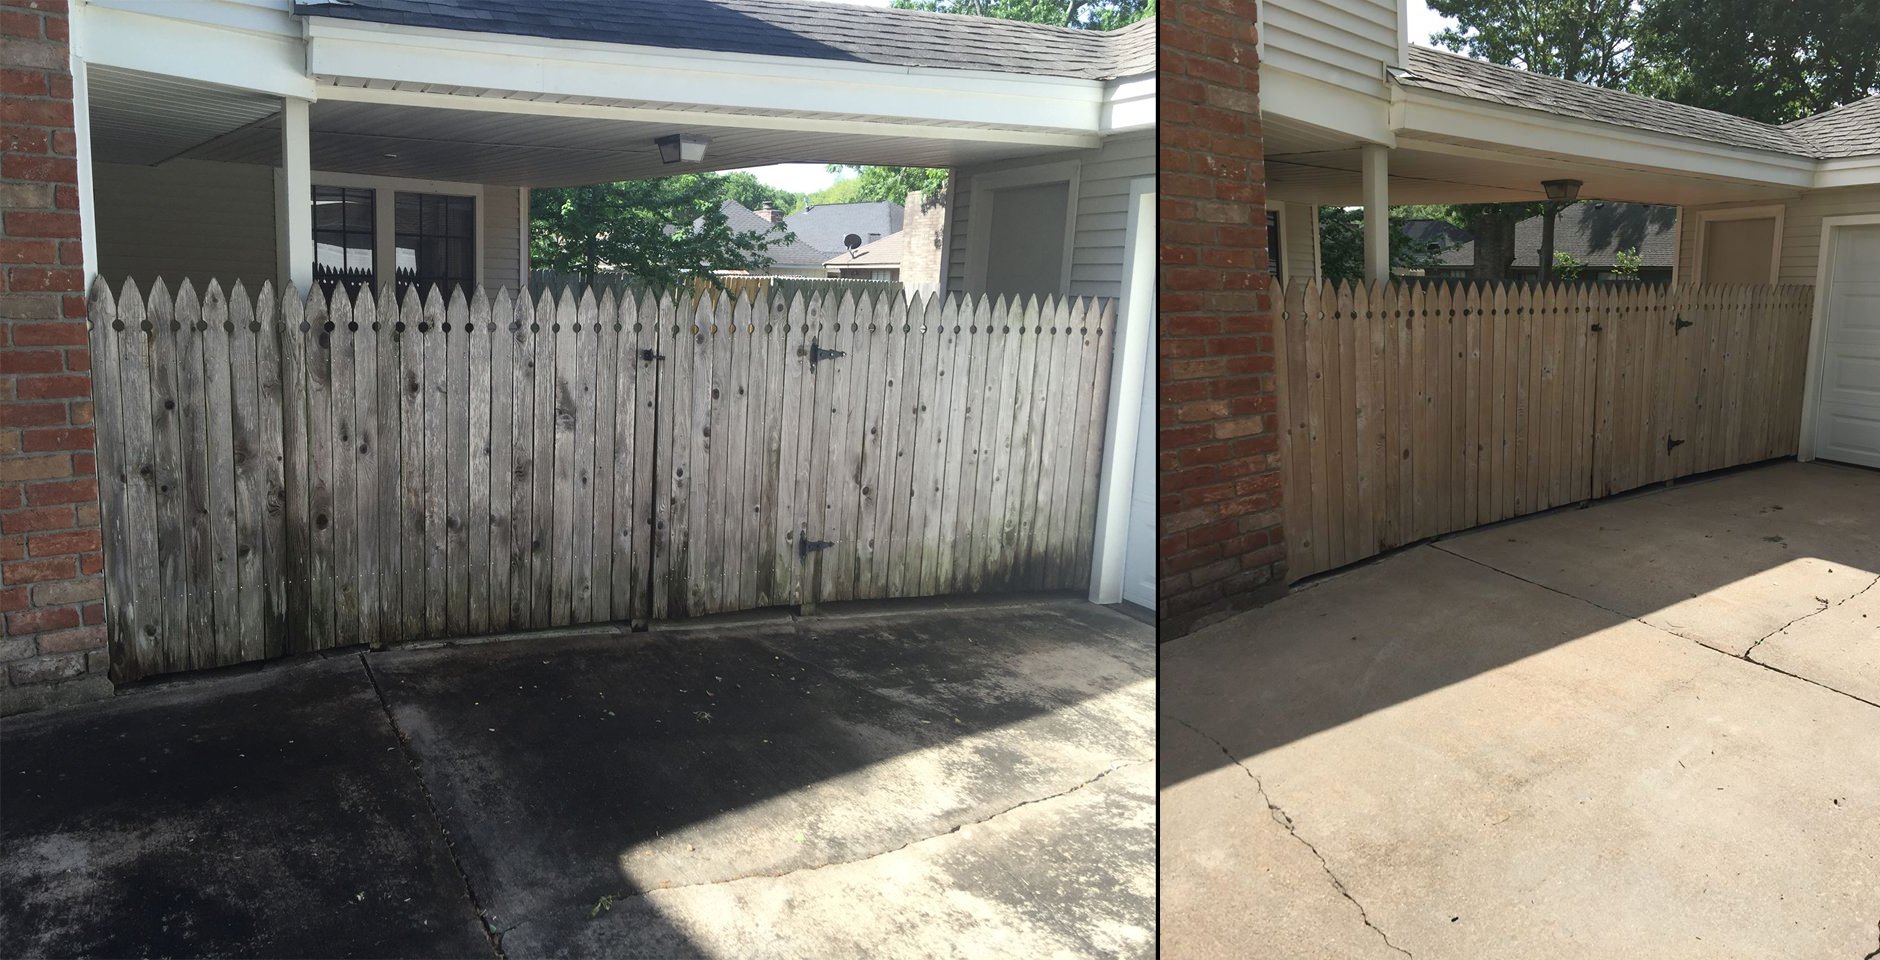
Cleaning your fence before staining isn't just about aesthetics - it's about creating the perfect foundation for your investment. When you skip this step, you're essentially trying to paint over dirt, mildew, and grime that prevent the stain from properly bonding with the wood. This leads to several problems:
Imagine spending hours on a beautiful fence project only to see it fade and deteriorate within months because you didn't take the time to properly prepare the surface. That's exactly what happens when cleaning is neglected. The wood fibers need to be open and clean to allow the stain to penetrate properly and create that lasting protection you want.
Understanding Your Fence Material
Not all fences are created equal, and understanding what you're working with makes all the difference in your cleaning approach. Wood fences, whether cedar, pine, or pressure-treated lumber, require different care than vinyl or composite options.
For wood fences, pay attention to:
Older fences may have accumulated years of dirt and weather damage, while newer ones might just need a light cleaning. Consider that some woods absorb stain differently than others. Cedar, for instance, tends to be more porous and might need multiple coats, whereas pressure-treated lumber often requires special preparation to remove any surface inhibitors that could interfere with staining.
A good rule of thumb is to test a small area first before committing to a full cleaning. This helps you understand how your specific fence material will respond to the cleaning process and any products you choose to use.
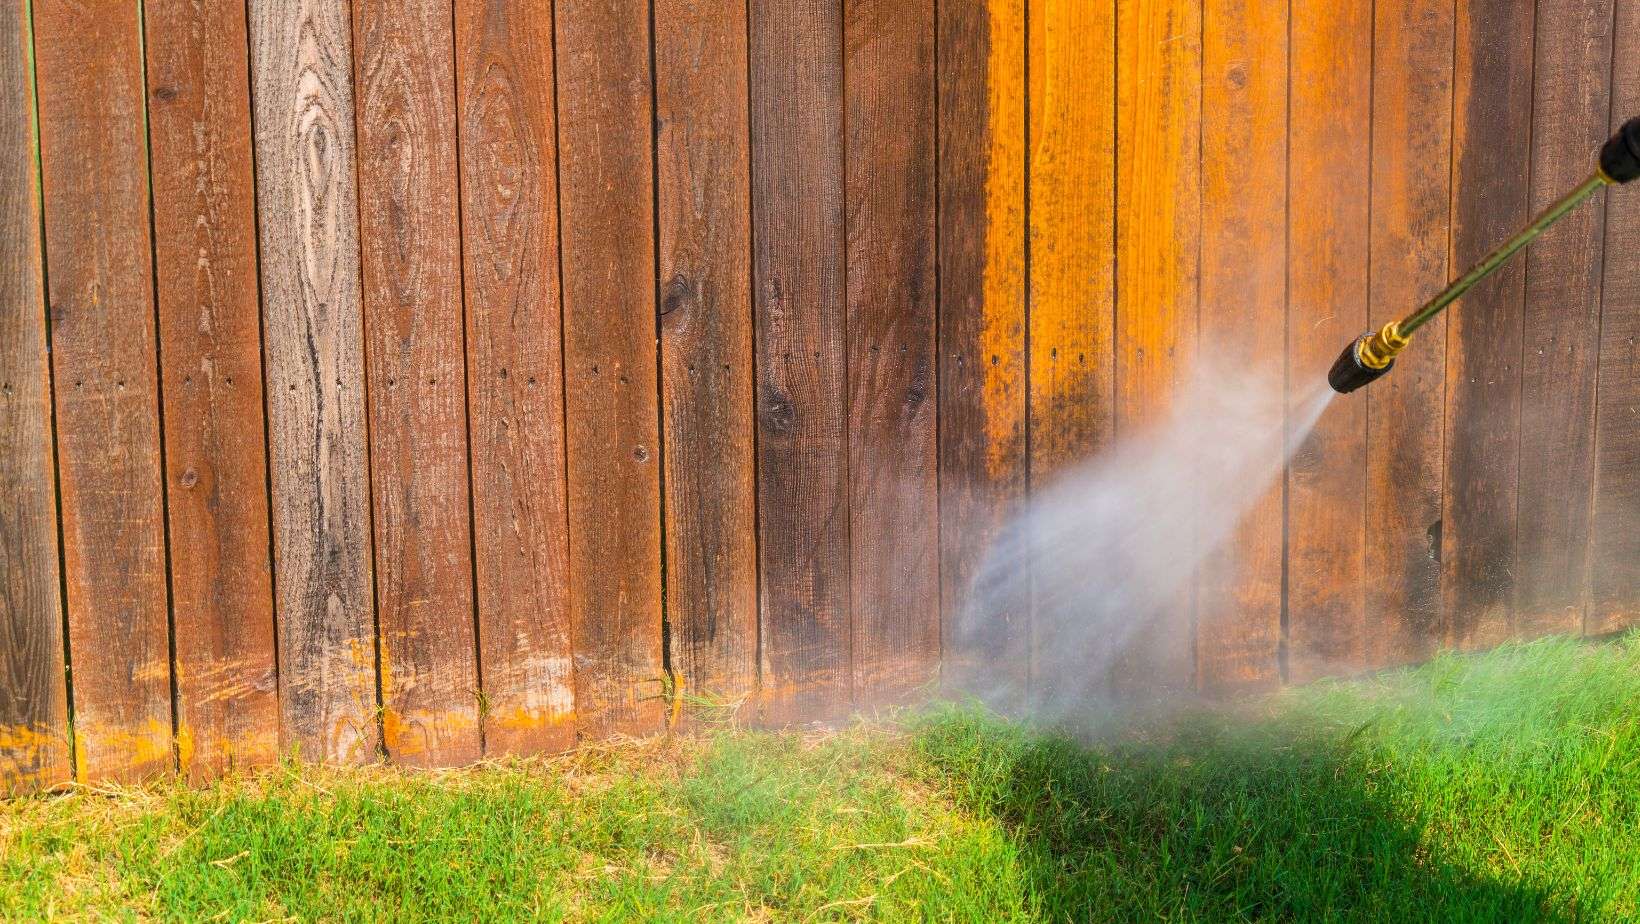
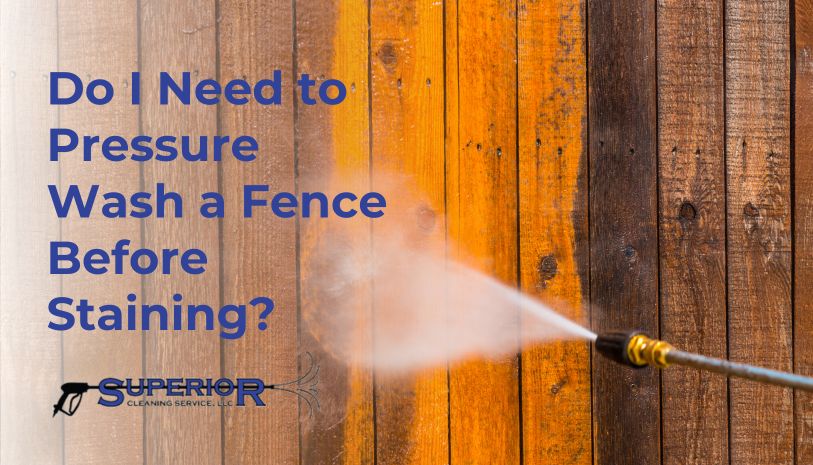
Essential Equipment for Power Washing
Before diving into the cleaning process, you'll want to gather the right tools. A quality power washer is essential, but it's not the only piece of equipment you'll need. Here's what to have ready:
The PSI setting matters more than you might think. Too high, and you risk damaging the wood or forcing water under the boards where it can cause rot. Too low, and you won't effectively remove built-up grime. Start with a lower pressure and increase gradually until you find the sweet spot that removes dirt without harming the fence.
Preparing Your Space and Safety
Safety should always come first when tackling any outdoor project. Before you turn on that power washer, make sure you've taken proper precautions:
It's also wise to check the weather forecast. Avoid power washing on windy days when debris might blow onto neighboring properties, and don't do it during extreme heat when the sun can make cleaning solutions evaporate too quickly. The ideal conditions are moderate temperatures with little to no wind. Remember, you're not just cleaning your fence - you're protecting your neighbors' property and your own safety.
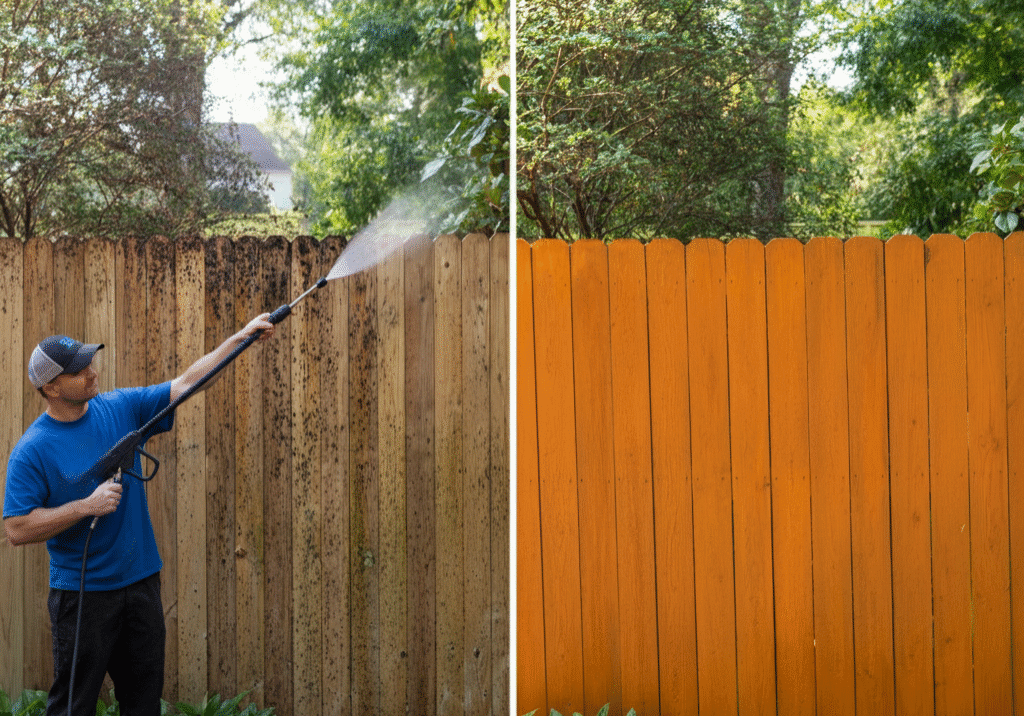
Step-by-Step Cleaning Process
Now comes the actual cleaning procedure, broken down into manageable steps:
1. Preparation: Remove any loose debris, leaves, or vines from the fence 2. Test a small area to determine the best cleaning solution and pressure settings 3. Apply cleaning solution according to manufacturer instructions - let it sit for the recommended time 4. Start with a wide-angle nozzle to remove loose dirt and grime 5. Work systematically from top to bottom to avoid streaking 6. Use appropriate pressure - adjust based on wood type and condition 7. Rinse thoroughly with clean water 8. Allow complete drying before applying stain
The key is methodical work. Rushing through this process often leads to missed spots or uneven results. Some people prefer to work in sections, cleaning one panel at a time. Others like to tackle the entire fence in one go. Both approaches work, but consistency is vital. Pay special attention to corners, posts, and areas where water tends to pool or where mildew commonly grows.
Common Mistakes to Avoid
Even experienced DIYers sometimes fall into traps that compromise their fence cleaning efforts. Here are the most frequent errors to watch out for:
One particularly frustrating mistake is not allowing the fence to dry completely after cleaning. Many people rush to apply stain immediately after rinsing, thinking they're saving time. But if moisture remains in the wood pores, the stain won't adhere properly and will eventually fail. Letting the fence dry for at least 48 hours (or longer in humid conditions) gives you the best chance of success. Also, don't forget that different fence types need different treatments. What works on a cedar fence might not work on a pressure-treated one.
Final Tips for Best Results
To get the most from your fence cleaning and staining efforts, keep these final pointers in mind:
Remember, the time invested in proper cleaning pays dividends in longevity and appearance. Your fence will thank you for taking the extra steps now rather than dealing with costly repairs later. And when you're done, you'll have a beautiful, protected fence that enhances your property's curb appeal and value for years to come. The satisfaction of seeing your hard work pay off is worth every moment spent preparing.
The Long-Term Benefits
Beyond the immediate visual improvements, proper fence cleaning and staining creates lasting value for your property. A well-maintained fence:
Think of it as a long-term financial decision rather than a simple cosmetic fix. The initial effort and cost of proper cleaning and staining is minimal compared to the potential replacement costs of a deteriorated fence. Plus, there's something deeply rewarding about seeing your labor produce such tangible results. Every brush stroke, every rinse, every careful application contributes to a beautiful outdoor space that reflects your attention to detail and care for your home.
Power washing your fence before staining isn't just another step in a checklist - it's the foundation upon which everything else rests. When you take the time to properly prepare your fence surface, you're investing in both its immediate beauty and its long-term durability. The process might seem daunting at first, but breaking it down into manageable steps makes it achievable for anyone willing to put in the effort. Remember, the goal isn't just to make your fence look good today, but to ensure it continues to look great for years to come. So don't skip that crucial cleaning phase - your fence will be grateful, and so will you. With the right approach and a bit of patience, you'll have a beautifully maintained fence that adds value and character to your outdoor space.


