I was so excited to upgrade my bathroom with a WS Bath Retro 1033.00 unit. It looked perfect on the website, and I thought I'd be saving money by ordering directly. I didn't realize I'd be spending an extra $300 because of a simple oversight. Let me tell you what happened.
If you've been looking at bathroom fixtures lately, you've probably come across the WS Bath Retro 1033.00. It's a popular choice among DIY enthusiasts and professionals alike for its classic design and affordable price point. But here's the thing – even though it's a decent product, there are some hidden costs that can easily catch you off guard. When I first ordered mine, I thought I had everything figured out. I mean, it was just a bathroom fixture, right? Wrong. I learned the hard way that sometimes the smallest details can cost you big money.
Why the WS Bath Retro 1033.00 Matters
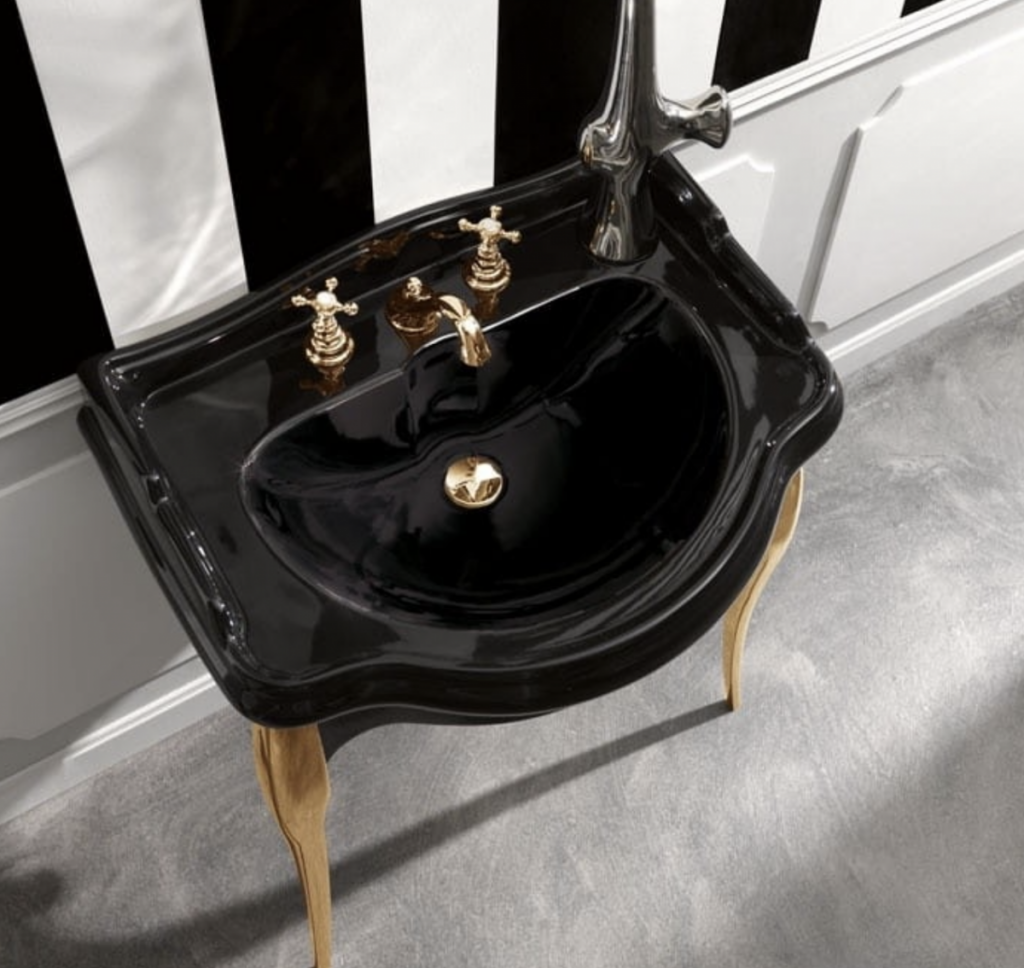
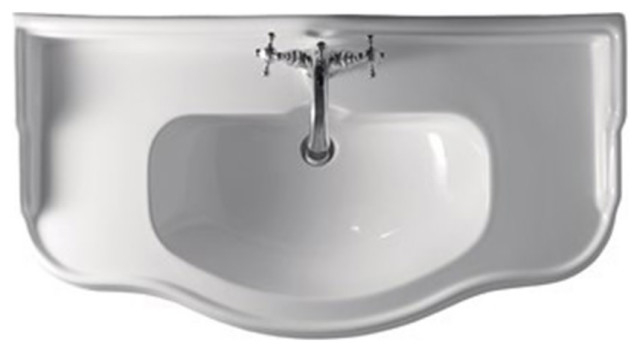
The WS Bath Retro 1033.00 isn't just another vanity unit. It's designed with a retro aesthetic that brings character to any modern bathroom. I've installed several of these over the past few years, and they definitely hold their own in terms of build quality and style. What really matters is that it's a mid-range option that offers good value when you factor in all the extras. But you have to understand what you're getting into before you make that purchase. In my case, the savings on the unit itself were offset by shipping, installation, and compatibility issues that added up quickly.
How I Approach Bathroom Fixtures
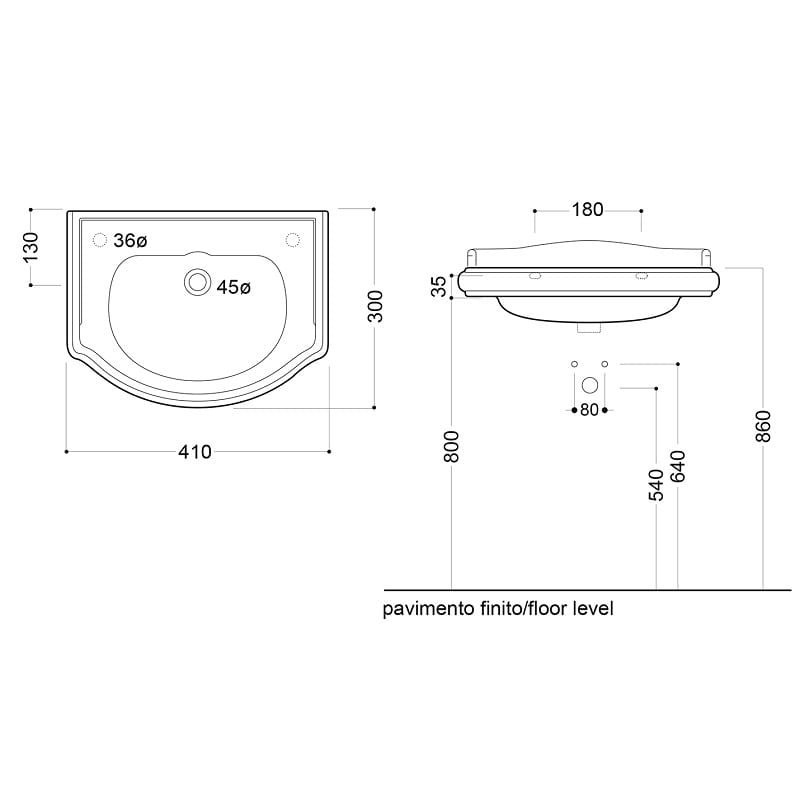
I always start with a rough measurement of the space and check the mounting requirements before anything else. For the WS Bath Retro 1033.00 specifically, I make sure to verify the backer board thickness and check if the unit needs additional support brackets. What I didn't do in this instance was double-check the wall stud placement and the type of mounting hardware included. This is something that seems minor but can cost you more than just the unit itself. I also like to order a few extra pieces for installation – things like shims, anchors, and sealants – just in case. Sometimes you find out during installation that the manufacturer's hardware isn't quite right for your setup.
The Mistakes I Made with the WS Bath Retro 1033.00
Let me be clear about this: I wasn't trying to be careless. I just assumed the WS Bath Retro 1033.00 would work exactly like other units I'd installed before. Here's what went wrong:
• I didn't read the installation manual carefully enough• I assumed the included mounting hardware would work with my existing studs• I didn't account for the extra weight and required reinforcement• I didn't factor in the cost of replacement parts
All of these things added up to about $300 extra in the end. Not just shipping fees, either – that included new mounting brackets, extra drywall repair materials, and even a trip to the hardware store for proper screws. I was pretty frustrated when I realized what I'd overlooked.
What Most People Get Wrong About Installation
Most people think that because a product looks straightforward, it must be easy to install. I've seen this happen with many bathroom fixtures, especially those that are advertised as "DIY friendly." But the WS Bath Retro 1033.00 has some unique features that aren't obvious until you're halfway through the process. Here's the part that most guides don't mention: the backer board requirements are very specific. If you're using a standard ½-inch backer board, you may need to add extra support underneath the unit. And the mounting hardware included isn't always sufficient for older homes or non-standard wall types.
Also, don't assume that the dimensions you see online match what you get in person. There can be slight variances between the product specs and the actual dimensions, which can cause alignment issues with adjacent fixtures.
Choosing the Right Mounting Solution
Here's what I wish someone had told me earlier: You shouldn't rely solely on the hardware that comes with the WS Bath Retro 1033.00. In my experience, it's better to invest in quality mounting solutions upfront rather than deal with the aftermath later. I'd recommend:
• Always bring your own mounting screws – they're cheaper and more reliable• Consider adding support brackets if your wall structure is less than ideal• Make sure you have the right tools for the job (especially a stud finder)• Have a backup plan for wall repairs in case of damage
These aren't expensive additions, but they can save you a lot of headache and money in the long run. I spent an extra $100 on proper mounting hardware alone, which could have been avoided with better preparation.
Frequently Asked Questions About the WS Bath Retro 1033.00
Q: Is the WS Bath Retro 1033.00 suitable for older homes?A: It depends on your wall construction. Older homes often require extra support, so check your stud placement and wall thickness before installing.
Q: Does it come with all necessary mounting hardware?A: Not always. I've found that while it includes basic hardware, it's best to have your own high-quality screws and brackets ready.
Q: How much extra should I budget for installation?A: I'd say at least 20% above the unit cost for installation-related expenses. That covers tools, extra materials, and potential repairs.
Q: Can I install it myself?A: Yes, but it requires careful attention to detail. If you're not confident in your installation skills, consider hiring a professional.
Q: What's the warranty coverage?A: The standard warranty covers defects in material and workmanship, but doesn't cover installation errors or damage from improper mounting.
Looking back, I'm glad I made that $300 mistake because it taught me a lot about the importance of detailed planning and preparation. The WS Bath Retro 1033.00 is still a solid choice for a bathroom upgrade, but you need to be aware of the potential pitfalls. My advice? Read every specification twice, check your walls thoroughly, and always budget for unexpected costs. If you're planning to tackle this yourself, spend a little more on quality mounting hardware – it'll save you from having to pay for replacements later. The key lesson here is that sometimes the cheapest solution isn't the most economical in the long run. I'd recommend doing a quick site assessment and ordering extra supplies before you even place your order. Trust me on this one – it's better to be safe than sorry.